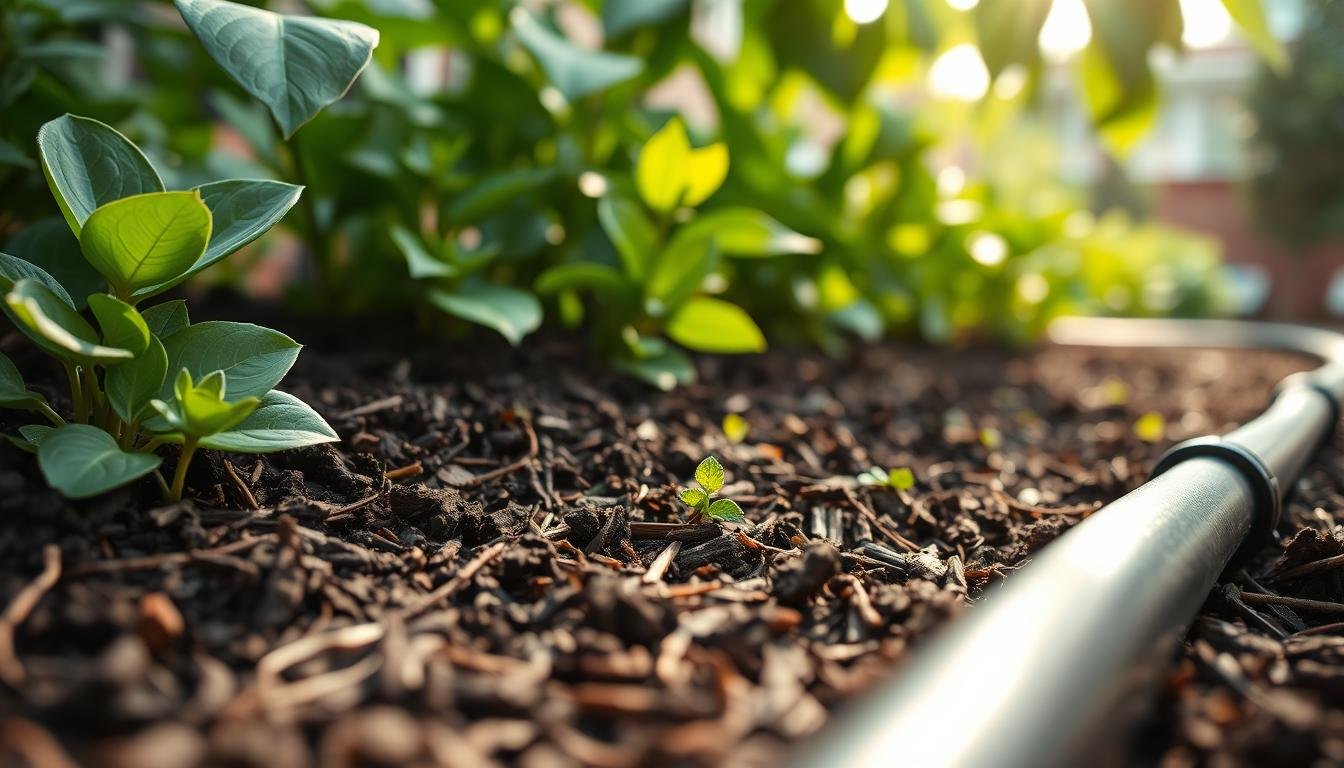
When one end of a garden bed stays dry while the other end gets plenty of water, a hidden kink in the 1/4-inch drip tubing is one of the first things to check. Mulch can hide a tight bend, crushed spot, or pulled section long enough for weak flow to look like a bigger irrigation problem.
The good news is that most of these problems can be narrowed down without tearing out the whole drip setup. Start by checking the emitters, flushing the line end, comparing pressure, and then uncovering only the section where the flow begins to drop.
Quick answer
1/4-inch drip tubing usually kinks under mulch because the line is bent too sharply, pulled tight, compressed by settled mulch, softened by heat, or shifted by foot traffic, pets, tools, or plant growth.
If nearby emitters drip normally but the far end of the run is weak, the issue may be a hidden restriction. If only one emitter fails, a clog is more likely. If several zones act weak at once, check pressure, filters, and the regulator before assuming the tubing is folded.
The fastest repair path is simple: confirm the problem, uncover the suspect section, reshape minor bends, cut out hard creases, reconnect compatible 1/4-inch tubing, and reroute the line with gentle curves before covering it again.
Key takeaways
- Uneven watering is the main clue. A dry patch after several working emitters often points to a restriction downstream.
- Do not pull up the whole bed first. Check emitters, filters, leaks, and end flow before disturbing mulch.
- Pressure readings can save time. Compare the water source with the far end of the line, then match any pressure decisions to your own drip system parts.
- Hard creases usually need removal. A permanently flattened section is better cut out and reconnected than repeatedly bent back into shape.
- Prevention comes from routing. Gentle curves, small slack, light mulch coverage, and secure tubing reduce repeat pinch points.
Helpful products at a glance
These support products match the three most useful steps in this kind of drip repair: diagnose pressure, reconnect damaged tubing, and keep the line routed more gently under mulch.
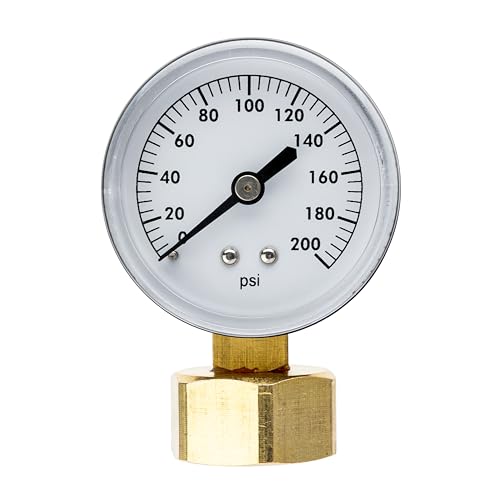
Best for pressure diagnosis because it helps check source-side water pressure
- For measuring water pressure in irrigation systems up to 200 PSI
- Metal case, plastic face with easy-to-read display, and precision mechanicals
Best for cut-and-coupler repair because it reconnects compatible 1/4-inch drip tubing
- plasic
- Universal coupling fitting connects two sections of any brand 1/4" Drip irrigation tubing in a straight line

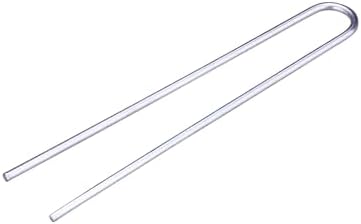
Best for prevention because it helps hold 1/4-inch tubing in gentler routes
- EASY TO USE STAKE: Secures supply tubing where you want them; keeps emitters near the root of plant for optimal growth and health; Ideal for use in flower and vegetable gardens; around trees and shrubs, and container plants
- HOW IT WORKS: Layout supply tubing, then tack down tubing with stakes
How to tell your 1/4-inch drip line is kinking under mulch
A hidden kink usually shows up as a pattern, not a single failed spot. The emitters closer to the water source may drip normally, while several emitters farther down the same 1/4-inch line slow down or stop.
Walk the bed while the zone is running. Look for one damp section followed by a dry section, then mark the point where the change begins. That transition is often close to the bend, crushed spot, leak, or clog causing the trouble.
Water-flow red flags
- Plants near the start of the line look watered, while plants farther down wilt sooner.
- Several emitters in a row bead slowly or do not drip at all.
- The end of the run has weak flow when you open the cap or flush point.
- The mulch feels dry and warm in one area but cool and damp nearby.
- The problem gets worse after heavy mulch settling, bed work, or hot weather.
A single dead emitter often points to debris inside that emitter. A stretch of weak emitters points more toward a restriction, pressure drop, leak, or folded line.
Quick checks before pulling back mulch
Before uncovering the tubing, run the zone briefly and confirm the basics. Make sure the timer is working, the valve is open, and other zones are behaving normally.
Then inspect the visible parts of the run. A popped fitting, split line, or loose connection can reduce downstream flow and mimic a kink. Clean the filter if the system has one, remove a few removable emitters if possible, and flush the line end to see whether sediment clears.
| What you see | Likely issue | First useful check |
|---|---|---|
| One emitter is weak | Clogged emitter | Remove, clean, or replace that emitter if it is serviceable |
| Several emitters become weak after one point | Kink, pinch, leak, or restriction | Open the line end and trace backward from the dry section |
| Every emitter in the zone is weak | Low source pressure, clogged filter, closed valve, or regulator issue | Check source-side pressure, filter, valve, and regulator fit |
| Wet mulch appears around a fitting | Leak or loose connection | Run the zone and inspect the fitting before covering it again |
| Flow drops after a sharp hidden turn | Folded or compressed tubing | Pull back mulch in small sections and look for a flattened bend |
A good drip repair starts with the pattern of the water, not with replacing parts at random.
What causes 1/4-inch tubing to kink under mulch?
Most mulch-hidden kinks come from pressure on soft tubing plus a routing mistake. A tight turn may look harmless during installation, but once mulch settles or the line warms in the sun, that bend can flatten and reduce flow.
Because 1/4-inch tubing is small, it does not need much force to fold. A little tension, a buried dip, or a sharp turn around a plant can create enough restriction to affect the rest of the run.
Sharp bends and tight turns
A forced corner is one of the most common failure points. If the tubing leaves a fitting and immediately turns hard under mulch, the bend can collapse like a pinched straw.
Use wider curves wherever you can. If a route has to turn tightly around edging, containers, or a raised-bed corner, a proper fitting may be better than forcing the tube into a tight arc.
Tension, twists, and heat
Tubing that is pulled tight has no room to move as the bed shifts. Heat, watering cycles, and plant growth can add stress until the weakest section folds.
Twists are just as easy to miss. A tube can look straight from above but still be rotated enough to collapse when mulch presses it down.
Mulch weight and garden traffic
Mulch protects soil, but a heavy layer can settle around tubing and press it against low spots. Foot traffic, kneeling in the bed, dragging pots, or leaning tools against the line can make the compression worse.
The risk is higher at edges, root flares, stake points, and places where the tube crosses a dip. Those areas deserve a closer look when flow drops suddenly.
How kinks affect drip irrigation performance
A kink reduces the inside opening of the tube. Water still enters the line, but less of it reaches the emitters past the restriction.
That is why the first few emitters may look normal while the far end of the run struggles. On longer runs, normal friction loss adds to the kink, so the last emitters suffer most.
Pressure and flow chain
- A folded tube reduces the effective line diameter.
- Lower flow reaches downstream emitters.
- Dry plants appear even though the timer is running.
- Repeated stress at the fold can weaken the tube or loosen fittings.
Do not assume every low-flow problem is a kink. A clogged filter, dirty emitter, split line, or wrong pressure setup can create similar symptoms. The goal is to separate those problems before making a repair.
Pinpoint the root cause without rebuilding the whole system
Once the simple visual checks are done, pressure testing can help narrow the problem. A basic hose-thread pressure gauge fits naturally in this step because it helps check whether the trouble starts at the water source or farther down the 1/4-inch line.
Run a quick PSI test plan
Attach a gauge at the hose bibb or faucet side and run the zone. Then compare that reading with what you see at the far end of the drip run, if your setup allows a safe and practical check there.
A healthy source reading with weak end flow points toward a restriction, leak, clogged filter, or blocked section somewhere in the run. A weak source reading points you back toward the faucet, valve, timer, filter, or regulator.
Do not treat one pressure number as correct for every drip system. Match pressure decisions to your emitter type, tubing, filter, regulator, and the manufacturer guidance for the parts you are using.
Confirm the pressure regulator
Check that the regulator is meant for drip irrigation and fits the setup you actually have. A mismatched or failing regulator can make several zones act weak or erratic, which can look like tubing trouble when the tubing is not the main issue.
If you want a simple source-side pressure check before uncovering mulch, you can check the current pressure gauge details on Amazon. Use the reading as a troubleshooting clue, not as a replacement for your system’s own pressure recommendations.
- For measuring water pressure in irrigation systems up to 200 PSI
- Metal case, plastic face with easy-to-read display, and precision mechanicals
- Durable brass fitting connects to a standard 3/4” hose faucet/tap
- Can be installed as a permanent gauge or used as part of a sprinkler toolkit
Clog vs. folded line checklist
- Clean the filter first. A dirty filter can reduce flow before water even reaches the 1/4-inch line.
- Inspect removable emitters. Debris in one emitter can make a localized problem look worse than it is.
- Flush the line end. Sediment may clear quickly if the problem is debris.
- Check for leaks. Damp mulch near a fitting may point to a loose connection instead of a kink.
- Pull mulch back in small windows. Trace the run only where the flow pattern suggests a problem.
If the end reading or end flow drops after a clear point in the run, uncover that section first. This keeps the repair focused and protects the rest of the bed.
Fixes that restore water flow without replacing the whole run
Start with the lightest repair that makes sense for the damage you find. Minor bends may recover. Hard creases, cracked tubing, or flattened sections usually should be removed.
For a light bend, turn off the zone, uncover the section, and gently straighten the tubing by hand. Warm sunlight or warm water can make the tube easier to reshape, but avoid boiling water because it can damage tubing or fittings.
When gentle reshaping is enough
A soft bend without a white stress mark, split, or permanent crease may recover after careful reshaping. Hold the tubing in a wider curve, run the zone briefly, and watch the downstream emitters.
If flow improves and the tube stays round, reroute the line so the same bend does not fold again under mulch. A repair that depends on the tube staying under tension is likely to fail later.
Cut and reconnect for severe damage
If the tube has a hard crease, crack, or flattened spot that does not stay open, cut out the damaged section. Use a sharp cutter, make clean ends, and reconnect the compatible 1/4-inch tubing with a barbed coupler.
Barbed 1/4-inch couplers fit this step because a severe crease usually needs the damaged tubing removed rather than reshaped again. Confirm your tubing size and fit before buying parts, since drip fittings are not always interchangeable across every tube style.
After reconnecting, run the zone before covering the repair. Look closely for leaks at both ends of the coupler and check the downstream emitters again.
For a small repair part that connects compatible 1/4-inch drip tubing, you can see the current coupler listing on Amazon. A coupler helps only after the damaged section is removed and the line is no longer under the same stress.
- plasic
- Universal coupling fitting connects two sections of any brand 1/4" Drip irrigation tubing in a straight line
- Self-piercing barbed end for insertion directly into the side of 1/2" or larger Drip tubing
- Unique barb design reduces insertion force; natural color blends with all earth tones
Reroute and protect tight turns
Do not put the line back exactly where it failed. Give the tubing a wider curve, avoid sharp bends right after fittings, and keep it from crossing low spots where mulch presses it down.
If the line has to pass around a plant, leave enough slack for growth and seasonal movement. Near trees and shrubs, route with future trunk and root growth in mind.
| Repair choice | Best fit | What to watch |
|---|---|---|
| Gentle hand reshaping | Soft bends that still look round after straightening | The bend may return if the route stays tight |
| Warm water or sun softening | Minor deformation in flexible tubing | Use warm water only, not boiling water |
| Cut-and-coupler repair | Hard creases, cracks, or permanently flattened sections | Confirm compatible 1/4-inch tubing and check for leaks |
| Rerouting with a wider curve | Repeated kinks near corners, plants, or edging | Leave slack without creating loops that snag tools |
| Hold-down stakes | Lines that shift under mulch or move during bed work | Do not press the stake so tightly that it creates a new pinch point |
Prevent kinking under mulch for the long term
Prevention is mostly about routing and restraint. The tube should lie naturally on the soil surface, follow gentle curves, and stay covered lightly enough that you can still inspect problem areas when needed.
Use mulch as protection, not as weight to hold a badly routed line in place. If the tubing needs pressure from mulch to stay down, it probably needs a better path or a small anchor.
Stake, shape, and leave slack
Hold-down stakes can help keep 1/4-inch tubing routed with gentle curves instead of letting mulch settlement or foot traffic push the line into a tight fold.
Place stakes where they support the route, especially near turns, container edges, tree flares, and long loose sections. The goal is to guide the tube, not clamp it flat.
Leave a little slack for heat, watering cycles, soil movement, and plant growth. Too much slack can snag tools; too little slack can pull the tube into a crease.
For readers trying to keep micro tubing in place after rerouting, you can see this drip tubing stake option on Amazon. Stakes are support pieces, not a fix for existing creases, clogs, leaks, or deeply buried tubing.
- EASY TO USE STAKE: Secures supply tubing where you want them; keeps emitters near the root of plant for optimal growth and health; Ideal for use in flower and vegetable gardens; around trees and shrubs, and container plants
- HOW IT WORKS: Layout supply tubing, then tack down tubing with stakes
- DESIGN FEATURES: Stake is 3-1/2 in. long; Two-pronged stake tacks tubing firmly into the ground
- MADE OF DURABLE MATERIAL: Tubing Hold-Down Stake is made of 11-gauge galvanized steel; Weather-resistant and made for durability
Mulch placement and pressure design
Lay the line on the soil surface and cover it lightly rather than burying it deep under heavy mulch. Thick mulch packs down most around bends, dips, and bed edges.
Keep runs reasonable for the emitter count and the water source. Long, crowded runs are more sensitive to restrictions, so a small kink can cause a larger drop at the far end.
Use a regulator and filter that match your drip setup, but avoid guessing. Drip systems vary by tubing, emitters, flow rate, and manufacturer recommendations.
Plan for plant growth
Young trees, shrubs, and perennial beds change shape over time. A line that fits neatly in spring can become tight by late summer if stems, roots, pots, or edging crowd the route.
Inspect the system at the start of the season and again during peak heat. Run each zone long enough to watch the farthest emitters and feel for dry patches under mulch.
Common mistakes to avoid
- Replacing parts before diagnosing the pattern. A clogged emitter, dirty filter, or loose fitting can look like a kink.
- Forcing 1/4-inch tubing around sharp corners. A tight route usually fails again, even after the first repair works.
- Covering repairs too soon. Always run the zone and check for leaks before replacing mulch.
- Using heavy mulch to hide messy routing. Mulch can worsen a bend that should have been rerouted.
- Assuming one PSI range fits all systems. Match pressure decisions to your actual drip parts.
FAQ
How can I tell if a 1/4-inch drip line is pinched under mulch?
Look for several weak emitters in a row, especially after a point where the bed changes from damp to dry. Open the end of the line if possible; weak end flow can point to an upstream restriction.
Should I check for clogs before uncovering the tubing?
Yes. Clean the filter, flush the line, and inspect removable emitters first. A clog is easier to fix than a hidden kink and can cause similar low-flow symptoms.
Can heat make drip tubing kink more easily?
Yes, warm conditions can make flexible tubing easier to deform, especially if it is already pulled tight or pressed under mulch. Repeated heating and cooling can make a stressed bend worse over time.
Is a pressure gauge necessary for every drip repair?
No, but it can be useful when the problem is unclear. A source-side reading helps you decide whether to investigate the water supply, regulator, filter, or a localized tubing problem.
When should I cut out the damaged section?
Cut it out when the tube has a hard crease, split, crack, or flattened spot that does not stay round after gentle reshaping. Reusing a damaged section often leads to the same flow problem again.
Can I prevent kinks by burying the line deeper?
Usually, no. Deep mulch or buried tubing can make kinks harder to find and may add compression at bends. A better approach is to place the line on the soil surface, route it gently, and cover it lightly.
How often should I inspect drip lines under mulch?
Check them at the start of the growing season and after heavy bed work, extreme heat, or major mulch settling. A quick midseason inspection can catch shifted lines before plants show stress.
Final verdict
Hidden kinks in 1/4-inch drip tubing are frustrating because the problem is often under mulch, not in plain sight. Still, the repair does not have to become a full system rebuild.
Start with the water pattern, then check the filter, emitters, end flow, pressure, leaks, and routing. Reshape minor bends, cut out hard creases, and reroute the tubing with gentle curves, light mulch coverage, and enough slack for the bed to move through the season.
The best fix is the one that solves the actual restriction without creating the next pinch point. That usually means careful diagnosis first, then a small repair where the line failed.