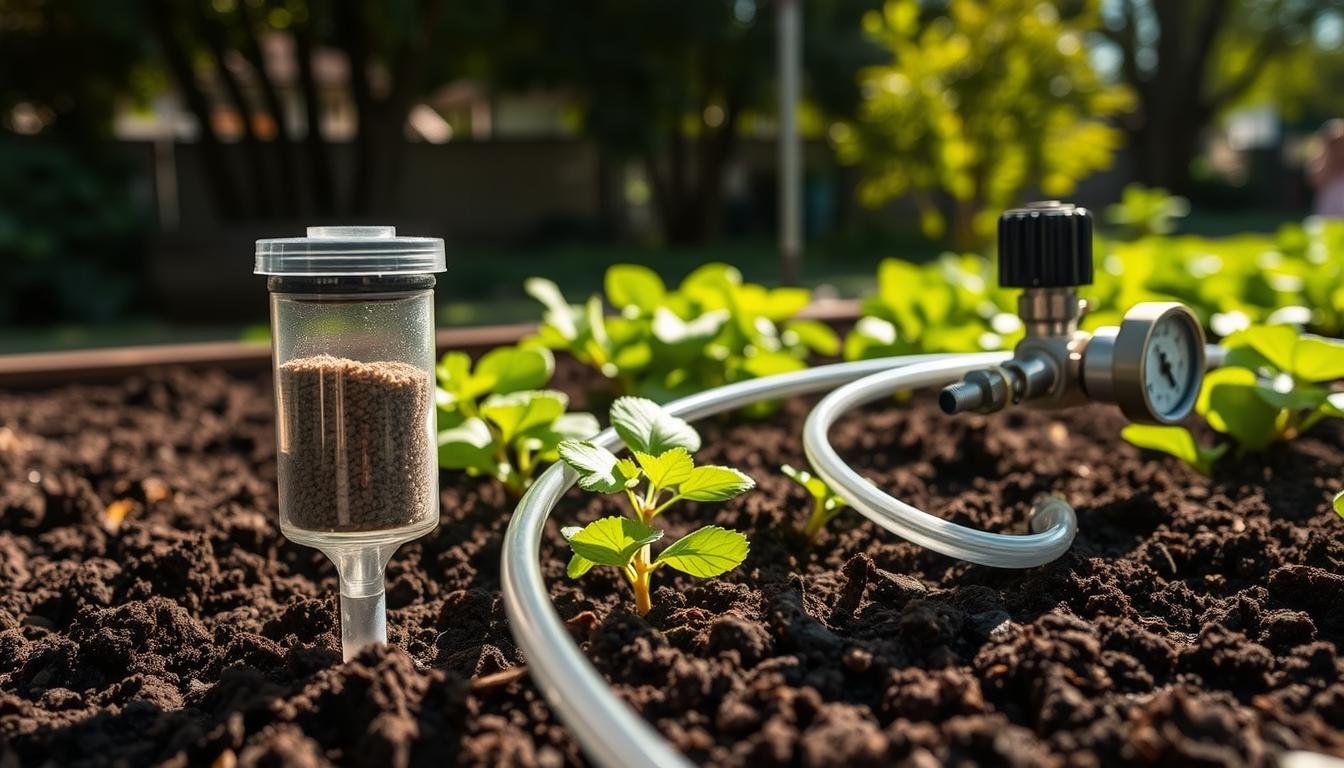
A raised bed drip system works best when the faucet-end parts are chosen before the tubing. The two parts most people underestimate are the sediment filter and the pressure regulator, because they protect everything downstream.
For a basic raised bed setup, plan the system from the faucet to the bed in this order: backflow preventer, pressure regulator, sediment filter or screen filter, mainline tubing, lateral dripline or emitter tubing, fittings, end caps, stakes, and an optional timer. If one of those early parts is missing, even a neat-looking kit can drip unevenly, clog faster, or put too much pressure on small tubing.
Quick answer: the raised bed drip parts you usually need first
The safest starting point is the water source. A raised bed drip setup usually needs a faucet or hose connection, backflow protection, pressure control, filtration, supply tubing, emitter tubing or dripline, fittings, end closures, and a way to flush the line.
A kit can make the process easier for a small bed, but only if the listed parts match your layout. For example, a small raised bed kit should clearly show the regulator, filter, tubing size, fittings, stakes, and end closures before you buy it.

For readers who prefer to build from separate parts, the faucet-end assembly matters even more. You need the filter, regulator, and backflow prevention in the right place before the tubing starts.
The best drip setup is not the one with the most parts. It is the one where each part matches the water source, bed layout, tubing size, and plant spacing.
Key takeaways
- Start at the faucet. Backflow protection, pressure regulation, and filtration should come before the drip tubing.
- Do not assume every kit is complete. Some kits may still need a timer, backflow preventer, extra fittings, or a separate filter.
- Match pressure to the tubing. Many drip parts are designed for lower pressure than a standard outdoor faucet may provide.
- Choose filtration based on water quality. Municipal water, well water, older plumbing, and sandy water can need different filter choices.
- Keep raised bed layouts short and testable. Long single runs often create weaker flow at the far end.
Helpful products at a glance
These products are useful examples for comparing what a raised bed drip setup should include. They are not a replacement for measuring your bed, checking your water pressure, and matching tubing sizes.
Best for small raised bed starter setups because it includes the main kit parts
- Convenient Drip irrigation kit has everything needed to water up to a 4’ x 8’ raised bed garden
- Ideal for all types of raised garden beds with professional-grade components that are built to last
Best for faucet-end control because it combines backflow, filter, regulator, and tubing connection
- Connects 1/2" Dip tubing to any 3/4" male pipe threaded faucet or garden hose
- Multi-function kit helps ensure proper operation of your Drip irrigation system
The correct order of raised bed drip system parts
A drip system is easier to understand when you follow the water. Start at the faucet, then protect the water supply, reduce pressure, filter debris, and only then send water into the tubing.
| Setup order | Part | Why it matters |
|---|---|---|
| 1 | Outdoor faucet or hose connection | Provides the water source and thread connection for the system. |
| 2 | Backflow preventer | Helps protect the household water supply if pressure reverses. |
| 3 | Pressure regulator | Reduces faucet pressure to a safer range for drip tubing and emitters. |
| 4 | Sediment, screen, or disc filter | Catches grit and debris before they reach small emitter openings. |
| 5 | Mainline tubing | Carries water from the faucet area toward the raised bed or beds. |
| 6 | Dripline, emitter tubing, drip tape, or emitters | Delivers water near the plant root zone. |
| 7 | Fittings, stakes, end caps, and flush points | Builds the layout, holds lines in place, and makes maintenance easier. |
Water source connection and hose starts
Most home raised bed systems begin at an outdoor faucet or garden hose connection. From there, you need a hose-thread adapter or faucet connection that fits the tubing style you plan to use.
Check the thread type and tubing size before buying fittings. Drip tubing labeled as 1/2 inch can vary by brand, so a connector that fits one tubing line may not fit another.
Backflow prevention
A backflow preventer helps protect the water supply if pressure drops or reverses. It is a small part, but it belongs near the faucet before irrigation water moves into the garden system.
Local requirements can vary, so it is worth checking what your area expects for irrigation connections. This matters more if the system stays attached for long periods or connects near fertilizer injectors or other garden treatments.
Pressure control
Drip tubing, drip tape, and small emitters are not designed for the same pressure as a typical open hose. A regulator lowers pressure so the system runs closer to the range listed for the tubing and emitters.
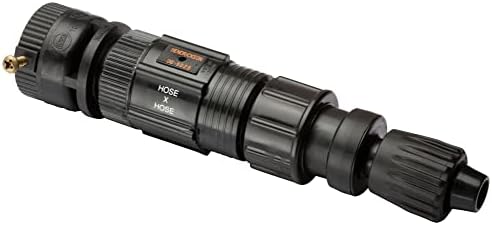
If you are building from separate tubing and emitters, a faucet connection kit like Rain Bird FCKIT-1PK can help keep the filter, regulator, and backflow parts together at the water source.
- Connects 1/2" Dip tubing to any 3/4" male pipe threaded faucet or garden hose
- Multi-function kit helps ensure proper operation of your Drip irrigation system
- Includes backflow preventer, 25 PSI pressure regulator and 150 mesh filter
- Compression fitting provides a leak-proof seal to 1/2" Drip tubing
Filter choice
A screen filter is often enough for relatively clean municipal water with occasional grit. A disc filter may be a better fit when water carries more fine sediment, organic debris, or well-water particles.
The filter should match the emitter or dripline requirements. Drip tape and small emitters can be less forgiving when debris slips through, so do not treat the filter as an optional accessory.
Lateral lines, emitters, and spacing
The lateral line is the part that waters the row. You can use 1/4-inch emitter tubing, soaker dripline, individual emitters, or drip tape depending on the bed shape and crop spacing.
Short, straight rows are easier to keep even. Long single runs are more likely to weaken near the far end, especially when too many emitters are added to one zone.
Fittings, end caps, stakes, and timers
Tees, elbows, couplers, inline valves, and end closures make the layout work. A hole punch, goof plugs, and extra fittings are useful because small layout mistakes are common during installation.
End caps should not be treated as permanent dead ends. A flushable end helps you clear sediment at the start of the season and after repairs. A timer can help with consistency, but it still needs adjustment after rain, heat waves, and plant growth changes.
Kit versus individual parts: which route makes more sense?
A starter kit is simpler when you have one small raised bed and want most of the parts in one box. Building from individual parts gives more control when the beds are larger, farther apart, or need a 1/2-inch or 3/4-inch mainline layout.
The main mistake is buying a kit only because it says “raised bed” on the listing. Look for the actual parts: regulator, filter, tubing size, emitter spacing, fittings, end closures, stakes, and instructions. You can also compare the current kit contents on Amazon if you want to see how a small raised bed kit lists its included parts.
| Buying route | Best fit | Main tradeoff |
|---|---|---|
| Raised bed starter kit | One small bed where the listed coverage and tubing limits match your layout. | Less flexible if you want to expand, change tubing size, or supply several beds. |
| Faucet connection kit plus separate tubing | Gardeners who want control over 1/2-inch tubing, emitters, and bed-by-bed layout. | Requires more planning and careful tubing compatibility checks. |
| Fully custom parts list | Larger raised bed areas, multiple zones, unusual spacing, or mixed plant water needs. | More chances to buy mismatched fittings if you do not plan first. |
How to size your drip system for flow, pressure, and raised bed layout
Good drip design starts with the layout, not the product box. Sketch each bed, mark the rows, and decide where the mainline will enter before cutting tubing.
PSI and GPH planning
Check the pressure range listed for the dripline, drip tape, or emitters you buy. A preset regulator can be useful, but the correct PSI depends on the components in your system.
Estimate water demand by adding the emitter output in one zone. If the farthest line drips weakly, the zone may be too large, the run may be too long, or the mainline may be undersized for the layout.
Run length and row design
Raised beds usually work best with short, parallel runs. Run the lateral line beside the crop row rather than weaving one long line through the whole bed.
If a bed has mixed crops, split watering by plant need where practical. Lettuce, tomatoes, herbs, and root crops may not need the same schedule even when they share the same raised bed area.
Soil type guidance
Sandy soil drains quickly, so it often needs shorter, more frequent watering and closer attention to emitter spacing. Loam is usually easier to manage because water spreads more evenly.
Clay holds water longer and can puddle if the system runs too long. In clay-heavy beds, slower cycles and careful observation matter more than simply adding more emitters.
- Test the system before covering lines with mulch.
- Check the farthest emitter, not only the first one near the faucet.
- Adjust watering after weather changes instead of relying on one timer setting all season.
- Separate zones when sunny beds and shaded beds dry at different speeds.
Filter and regulator specs that prevent clogs and uneven watering
Clean water and steady pressure are the two parts that keep emitters working more evenly. A filter catches debris before it reaches the tiny outlets, while a regulator keeps the system closer to the pressure range the parts were designed for.
That does not mean a filter prevents every clog or a regulator prevents every leak. Tubing cuts, loose fittings, buried kinks, dirty filters, and overextended runs can still cause problems.
What mesh ratings mean
Filter mesh describes how fine the screen is. A finer filter catches smaller particles, but it may also need more frequent cleaning if your water carries a lot of sediment.
For clean city water, a basic screen or filter washer may be enough for some small systems. For well water, sandy water, or drip tape, compare the filter requirement listed by the emitter or drip tape manufacturer before choosing.
How stable pressure affects uniform output
Pressure that is too high can stress tubing and fittings. Pressure that is too low can leave the far end of a run weak.
Install the regulator in the correct order near the faucet, then test the system before planting around the lines. If you are choosing a faucet-end assembly, you can view the current faucet-end kit details on Amazon to compare the listed backflow, regulator, filter, and tubing adapter details.
Example shopping list for a raised bed drip system
Use this as a practical checklist before buying a kit or building your own system. The exact quantities depend on bed count, bed size, plant spacing, tubing route, and where the faucet sits.
Core parts to check before buying
- Backflow preventer for the faucet connection.
- Pressure regulator matched to the drip components.
- Sediment, screen, or disc filter based on water quality.
- Mainline tubing, often 1/2-inch or 3/4-inch for feeding beds.
- Emitter tubing, dripline, drip tape, or individual emitters for rows.
- Tees, elbows, couplers, barbed fittings, compression fittings, or easy-loc fittings.
- End caps or flushable closures.
- Tubing stakes to hold lines in place.
- Hole punch and goof plugs for layout adjustments.
- Optional hose-end timer for scheduling.
For a small raised bed, a kit like the Rain Bird GARDENKIT can be a useful example because it shows the core parts to check before buying: regulator, filter, tubing, fittings, stakes, and end closures.
- Convenient Drip irrigation kit has everything needed to water up to a 4’ x 8’ raised bed garden
- Ideal for all types of raised garden beds with professional-grade components that are built to last
- Waters at low volume near roots for healthier plants, higher yields and up to 80% water-savings
- Pressure-compensating emitters deliver even watering throughout garden beds
When a starter kit is enough
A starter kit can make sense when your bed is close to the faucet, the kit coverage matches the bed size, and you do not need to stretch tubing across several separate beds.
Pay close attention to expansion warnings. Some small 1/4-inch kits are not meant to be extended with more tubing because flow can drop at the far end.
When to build from individual parts
Build from parts when you have several beds, longer distances, mixed crop spacing, or a layout that needs a larger mainline. This approach takes more planning, but it lets you choose the filter, regulator, fittings, and tubing style around the garden you actually have.
What to avoid when buying raised bed drip system parts
A drip system does not have to be complicated, but small buying mistakes can cause repeated leaks, clogs, and weak watering. Check these details before cutting tubing or snapping fittings together.
- Do not skip the regulator unless the product instructions clearly say the setup can handle your water pressure.
- Do not skip filtration if your water has grit, rust flakes, sand, or organic debris.
- Do not mix tubing and fittings casually. Check brand sizing and connection style first.
- Do not bury lines before testing. Run the system and inspect every connection.
- Do not use one timer schedule forever. Soil moisture changes with weather, plant size, mulch, and sun exposure.
- Do not assume a small kit can expand endlessly. Check the manufacturer’s tubing and flow limits.
Maintenance tips that keep the system easier to manage
Drip systems need occasional attention. A few minutes of checking can prevent the slow problems that show up later as dry plants, puddles, or blocked emitters.
Flush lines before the season gets busy
Open the end of each line and let water run briefly before closing it. This clears loose debris that may have collected during setup, storage, or early-season use.
Clean the filter regularly
A dirty filter can reduce flow across the whole bed. If the system starts strong and then weakens, check the filter before replacing tubing or emitters.
Watch for sun damage, kinks, and loose fittings
Raised beds are easy to work around, but tools, mulch, foot traffic, pets, and summer sun can move or stress small tubing. Inspect lines during normal garden checks.
FAQ
What basic parts do I need for raised bed drip irrigation?
You usually need a faucet connection, backflow preventer, pressure regulator, sediment filter, supply tubing, dripline or emitters, fittings, end caps, stakes, and a way to flush the lines. A timer is helpful, but it is not a substitute for checking soil moisture.
Why is a pressure regulator important?
A regulator lowers faucet pressure to a range that drip tubing and emitters can handle. Without one, small tubing and fittings may leak, pop apart, or water unevenly.
Should the filter go before or after the pressure regulator?
Follow the product instructions for the parts you buy, because some faucet-end kits combine these pieces in a set order. The main goal is to have both filtration and pressure regulation before water reaches the drip tubing.
Is a screen filter or disc filter better?
A screen filter can work for relatively clean municipal water. A disc filter may be better for well water, organic debris, fine sediment, or drip tape setups that clog easily.
Can I use 1/4-inch tubing for a whole raised bed system?
Use 1/4-inch tubing mainly for short laterals or small bed layouts. For multiple beds or longer distances, a 1/2-inch or 3/4-inch mainline is often easier to manage, if it matches your fittings and flow needs.
How do I know if a kit is too small?
A kit may be too small if your bed area is larger than the listed coverage, the faucet is far away, or you need to water several beds from one zone. Also check whether the kit warns against adding more tubing.
Do raised beds need more frequent watering than in-ground beds?
They often can, especially in hot sun or fast-draining soil. Raised beds warm and drain differently, so check soil moisture instead of relying only on a fixed schedule.
Are timers worth adding?
Timers are useful for consistency, especially during busy weeks or warm weather. They still need seasonal adjustments because rain, heat, mulch, and plant growth change how much water the bed needs.
Conclusion
A good raised bed drip system starts with the parts that protect the whole layout: backflow prevention, pressure regulation, and filtration. Once those are handled, tubing size, emitter spacing, fittings, end closures, and timers become much easier to plan.
If you buy a kit, check what it includes before assuming it is complete. If you build from parts, match every connector, filter, regulator, and tubing size to the actual bed layout. That slower planning step can save a lot of frustration once the garden is planted.