
Could a pale lettuce or tiny tomato be whispering a secret about your garden?
Many vegetable beds underperform because of hidden nutrient gaps. Pale yellow leaves, stunted growth, and early fruiting often point to missing macro or micronutrients.
We’ll help you read plants, run quick at‑home checks, and use a lab test so you know, not guess, whether your garden needs attention right now.
Expect clear steps: visual cues to watch, fast texture and drainage checks, and guidance on when lab results should drive amendments for reliable results.
Raised beds and rich topsoil blends can still lack balance. A complete organic fertilizer often shows greener growth within a week when nutrients are missing, but a lab test offers the full picture.
Key Takeaways
- Look for pale leaves and small plants as early signs of nutrient stress.
- Run simple at‑home texture and pH checks, then confirm with a lab.
- Use targeted amendments rather than random products to save time and money.
- Compare foliage color at farmers markets to sharpen your eye.
- Find step‑by‑step DIY testing tips at simple soil tests.
Healthy soil basics: what good structure, air, water, and organic matter look like right now
Healthy soil feels alive: crumbly, dark, and full of tiny helpers that feed plant roots and hold moisture.
Picture a crumbly, dark mix with clear pore spaces. That structure traps air for root respiration and holds water without drowning roots.

Dig a little and check the top 8 inches. Most plant roots live here, so protect and enrich this zone with compost and organic matter.
Look for signs of life: earthworms, fine white fungal strands, and a fresh, earthy smell. These indicate active microbes that turn residues into nutrients.
“Gardeners judge ground by touch—squeeze a handful; if it crumbles, it’s ready to work.”
Good drainage means water soaks in and spreads, not pools. If water sits, add organic matter rather than sand to loosen dense clay.
- Work when ready: use the squeeze-and-crumble test before digging.
- Protect the root zone: avoid foot traffic and minimal tilling in the top layer.
- Watch nitrogen: turning fresh material can tie up nitrogen briefly; a small boost helps microbes and plants.
For background on living soil and ecosystems, see healthy soil and ecosystems.
Visual clues your plants give when nutrients are low
Quick signs on leaves, stems, and roots tell you whether feeding is the missing piece. Spotting these cues early saves time and supports steady growth.
Look closely: leaf color and root shape tell a lot about what’s missing below ground. Pale or yellow leaves with undersized plants often point to nutrient stress rather than poor light.

Leaf color and patterns
Scan leaf color. Most vegetables should be a deep, even green. Uniform yellowing often signals low nitrogen.
Interveinal yellowing — yellow between veins — hints at specific shortages like iron or magnesium. Purpling on leaves and stems can signal low phosphorus or cool conditions. Match visual clues with simple moisture checks before changing feeds.
Growth signals
Watch for stunted growth, thin stems, or early fruiting on small plants. These are classic signs a plant is diverting resources to reproduce rather than grow.
Root check
Gently lift a plant. Healthy roots are white or cream, evenly branched, and proportional in shape. Brown, stubby, or circling roots suggest compaction, poor matter content, or waterlogged spots that limit nutrient uptake.
- Compare leaf color to deep green examples at a market to train your eye.
- If a balanced feed produces quick green growth within a week, that response is a strong clue of prior limitation — but confirm with a test before large changes.
Simple at‑home checks before you amend anything
Quick, hands‑on tests show whether the ground will hold nutrients or trap water. Do them before adding amendments to avoid wasted effort and expense.
Start with the hand texture test. Wet a small handful and squeeze. If the sample forms a tight, slippery ball, that points to clay soil. A gritty crumble feels like sand. Loam holds together loosely and breaks with light pressure.

What does the 12‑inch hole test reveal?
Dig a hole about 12 inches deep and fill it with water. Time how long the water takes to drop.
Drainage within a few hours means good infiltration. Water standing after 24 hours signals compaction or heavy clay that restricts root access and nutrient movement.
Don’t add sand to clay soil. Instead, mix in organic matter or use raised beds to improve drainage and plant health.
Can you work the ground now?
Try the squeeze‑and‑crumble check. Pick a handful and press with your thumb. If the sample crumbles under pressure, the ground is ready to work.
If it forms a hard lump, it’s too wet. Working wet ground damages structure and makes compaction worse.
- Note root‑zone clues: smeared hole sides or dense layers mean restricted roots and lower nutrient uptake.
- Observe aggregate shape: stable crumbs that resist smearing show good structure for air and water flow.
- Match care to type: sandy spots need more organic matter and frequent, smaller feeds; clay areas gain most from compost and slow improvement.
Keep a brief record of tests across the garden. Re‑test after amendments to confirm improved infiltration and crumbly texture before applying more changes.
How tell if your soil has enough with a soil test
A clear lab report is the fastest route from question to action. Collecting a proper sample is the real first step before adding anything to a bed. A test gives pH and nutrient levels so you apply the right amounts, not guesses.

Taking a proper soil sample: depth, mixing, and clean tools
Use clean, non-galvanized tools to avoid contamination. Gather 10–15 small cores from across the area.
For vegetable beds, go 6–8 inches deep and mix cores in a clean bucket into a composite sample.
Label and send only the mixed sample so lab results reflect the whole bed.
pH targets for vegetables and dolomitic lime advice
Most vegetables prefer pH 6.0–6.5. Apply dolomitic lime only when tests show acidity below that range.
Do not add lime to pH ≥6.5. Doing so can lock out nutrients and cause yellow leaves, stunting, and poor fruiting.
“Mix lime in 2–3 months before planting; it changes pH slowly.”
When and how often to test
Run tests every 1–2 years in vegetable beds. Labs usually return results in about 4–6 days after receipt.
Read recommendations on the report; they translate numbers into practical rates and timing so you can water in amendments and protect the garden.
Turning results into action: amendments, compost, and fertilizer choices
Let test results map the next steps so every amendment earns its place. This short guide shows practical moves after a soil test so plants get balanced feed without waste.
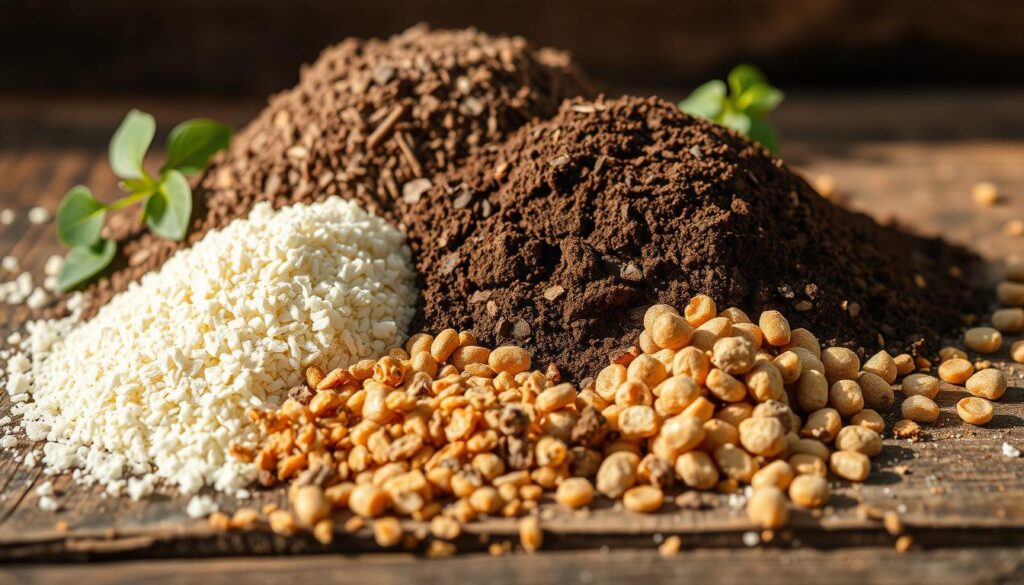
What’s the first step to take?
Start with the lab report. Base amendments on measured needs rather than guesses.
Follow the recommended amounts on the report and water them in to move nutrients to the root zone.
How does compost help?
Add finished compost to most beds to boost organic matter. It opens dense clay soil for better drainage and adds moisture to sandy spots.
Use fully decomposed material only. Avoid hot or steaming piles and choose trusted sources like leaf or certified mushroom compost.
Which fertilizer numbers fit my crops?
Match grades to crop demand. Use 10‑10‑10 for broad maintenance, 6‑12‑12 for root and bloom support, and 5‑10‑15 when potassium help is needed.
When should lime be used?
Apply lime 2–3 months before planting so it can react. Skip liming when pH is 6.5 or higher to keep nutrients available.
- Support nitrogen where the test shows low levels; steady N promotes leafy growth and even ripening.
- Add a small nitrogen source when turning in fresh, undecomposed material so microbes don’t rob plants of nutrients.
- Re‑check next season; your results will show how amendments changed levels and guide the next step.
“Let measured needs guide the garden; small, targeted amendments beat blanket treatments every time.”
Soil type matters: tailoring steps for raised beds, topsoil blends, and garden beds
Different bed types need different care. Raised beds warm and drain faster. Blended topsoil and compost mixes vary widely in nutrient content and structure. A quick check saves wasted amendments and time.

Signs a blended mix needs more nutrient support
Many commercial garden mixes look rich but hide low levels of key nutrients. Pull a sample for lab testing before heavy planting. Tests show actual nutrient levels so you apply targeted amendments.
Run the 12‑inch hole drainage check near beds. Slow water drop points to compaction or poor drainage. Add organic matter or consider raised construction rather than adding random fertilizer.
- Raised beds: better air and drainage, but they dry fast—plan watering and compost top‑dressing.
- Topsoil blends: test after delivery; supplier mixes vary by batch.
- Depth: aim for 10–12 inches of well‑amended depth so plant roots establish and avoid compaction layers.
“Test first, amend precisely — your garden will repay the care.”
Season-long soil health: monitor, adjust, and protect
Keep an eye on beds through the season to protect structure, air, and steady growth.Regular checks and simple steps let gardens recover fast from midseason dips.
Midseason checks catch fading vigor before yields drop and let you act with targeted fixes.
Mid-season checkups: spotting yellow leaves and quick responses
When leaves turn pale midseason, earlier amendments can wear off. Reassess water first, then follow prior test recommendations for a side-dress.
Side-dress heavy feeders at bloom or fruit set and water in amendments so nutrients reach active roots.
Mulch, cover crops, and protecting structure
Mulch with clean straw or leaf mold to keep water in and prevent crusting. Confirm materials are free of persistent herbicides.
Plant cover crops—rye, vetch, or crimson clover—between planting cycles to add compostable matter and feed microbes.
Avoid walking on wet beds; use boards or paths to preserve air pockets and root space.

| Action | When | Benefit | Quick Tip |
|---|---|---|---|
| Midseason check | Every 3–4 weeks | Catch nutrient drop | Check color, moisture, growth |
| Side-dress | At fruit set | Boost yield | Use test-guided rates |
| Mulch & cover | After planting / between crops | Conserve water, add matter | Use clean straw or clover |
| Finish season compost | Post-harvest | Prepare beds for spring | Top-dress, lightly mix |
Conclusion
Test regularly, act in small steps, and protect structure to turn observations into reliable results. These clear moves save time and build a garden that improves each season.
Small, regular choices beat one big fix. Make a soil test the first step when doubts arise, then follow the step‑by‑step recommendations on the report.
Read plants, confirm with data, and feed with targeted amendments. This rhythm saves time and yields steady, compounding gains.
Protect the root zone with mulch, careful watering, and limited foot traffic. Add organic matter often and resist rushed, large changes.
Track a few things—leaf color, growth pace, and moisture—so you can adjust early and avoid larger problems later. Observe, test, amend, protect: repeat these steps and success follows.
FAQ
What are the quickest visual signs that nutrients are low in garden beds?
Look for pale or yellowing leaves, uneven color between veins (interveinal chlorosis), purple tints on older foliage, slow or stunted growth, and weak stems. These clues point to deficiencies in nitrogen, magnesium, or phosphorus. Compare affected plants to healthy ones nearby to spot patterns.
What does healthy soil structure, air, water, and organic matter look like right now?
Healthy garden ground crumbles easily, drains well yet holds moisture, smells earthy, and shows visible organic bits like partially broken-down leaves. Roots grow deep and branch freely. You’ll see steady plant growth without waterlogging or hard crusts on the surface.
How can leaf color and patterns help identify specific nutrient problems?
Deep green usually means adequate nitrogen; uniform yellowing suggests nitrogen shortage. Interveinal yellowing often signals magnesium or iron issues. Purple or red on older leaves can indicate phosphorus lack. Match the symptom pattern with plant age and growth stage for a clearer diagnosis.
Which growth signals indicate nutrient stress rather than pests or disease?
Uniform stunting across many plants, thin weak stems, delayed flowering, or premature fruiting often point to nutrient or root problems. Pest or disease damage is usually patchy, localized, or shows chewing, spots, or mildew rather than whole-plant decline.
What should I look for when checking roots to assess soil health?
Healthy roots are white or light-colored, firm, and well-branched. Brown, slimy, or stunted roots suggest poor drainage, compaction, or disease. Shallow root systems often mean compacted layers or hardpan restricting nutrient access.
How do I perform a simple texture test by hand and interpret results?
Rub a moist pinch of soil between fingers. Sandy soil feels gritty and won’t hold shape. Clay feels sticky and forms a tight ribbon. Loam crumbles into a loose ball and holds together briefly. Sandy soils drain fast and need organic matter; clay benefits from compost to improve structure.
How do I run a 12-inch drainage test and read the results?
Dig a 12-inch hole, fill it with water, let it drain, then refill and time how long water drops one inch. Fast drainage (under 30 minutes) suggests sandy, low-nutrient soil. Very slow drainage (over 8 hours) indicates compaction or poor structure needing organic amendments or deeper loosening.
What is the squeeze-and-crumble workability test for planting readiness?
Take damp soil and squeeze it in your hand. If it forms a ball that crumbles easily when poked, it’s workable. If it stays as a sticky ribbon, it’s too wet or compacted. Good workability means roots can penetrate and microbes can breathe.
How do I take a soil sample correctly for a lab test?
Use a clean trowel, take 6–10 samples across the bed at planting depth (6–8 inches for vegetables), mix them in a clean bucket, and send a composite sample in a clean bag to the extension lab. Avoid near compost piles, fertilizer bands, or old fence lines for representative results.
What pH should I aim for with vegetables, and when is dolomitic lime needed?
Most vegetables prefer pH 6.0–7.0. Use dolomitic lime if lab results show pH below target and magnesium is low. Apply lime months before planting so it can react with the soil; follow lab-recommended rates to avoid over-application.
How often should I test soil and what about seasonal timing?
Test every 2–3 years for general monitoring and before major changes or new beds. Test in fall or early spring for best planning—labs usually have faster turnaround in off-peak months. Test sooner if crops show sudden widespread issues.
What’s the first step after getting lab results?
Base amendments on the report, not guesswork. Prioritize pH corrections, then add missing macro- and micronutrients at recommended rates. Start with organic matter like compost to improve structure and nutrient retention before adding concentrated fertilizers.
How does compost help clay and sandy soils differently?
In clay, compost increases aggregation and drainage by loosening dense particles. In sandy soils, it boosts water- and nutrient-holding capacity. Regular additions—2–3 inches worked into the top 6–8 inches annually—builds long-term resilience.
How do I choose between balanced fertilizers like 10-10-10 and specialty blends like 5-10-15?
Match the N-P-K ratio to crop needs and lab results. Use balanced mixes (10-10-10) for general feeding. Higher phosphorus blends suit root and fruiting crops; higher potassium supports flowering and stress tolerance. Always follow label rates and personal soil data.
When and where should lime be applied for best effect?
Apply lime in fall or several months before planting to allow soil reaction. Broadcast and lightly incorporate into the top 4–6 inches or work into beds when preparing soil. Follow lab-recommended amounts to correct pH safely.
How can I support steady nitrogen levels and trace nutrients through the season?
Use slow-release organic sources like composted manure, blood meal, or feather meal timed to crop demand. Include legumes or side-dress with lower-dose nitrogen when rapid growth begins. Foliar sprays can supply trace elements quickly when deficiencies appear.
How should soil management differ for raised beds, blended topsoil, and in-ground garden beds?
Raised beds need regularly refreshed organic matter and balanced topsoil mixes. Blended topsoil may require supplemental nutrients if it’s overly sandy or screened. In-ground beds benefit from deep organic amendments and attention to compaction and drainage.
What signs show a blended topsoil and compost mix still needs nutrient support?
Slow growth despite good texture, pale new leaves, or rapid nutrient leaching after heavy rains indicate the blend lacks stable organic matter or nutrients. Add compost, a slow-release fertilizer, or season-long amendments per soil test.
What mid-season checks help catch nutrient issues before yield suffers?
Inspect foliage monthly for yellowing, spotting, or slowed growth. Check soil moisture and compaction. Test quickly for nitrogen or micronutrients if many plants show the same symptoms. Small, timely amendments prevent big losses.
How do mulch, cover crops, and avoiding compaction protect soil structure and air?
Mulch conserves moisture, moderates temperature, and feeds microbes as it breaks down. Cover crops add organic matter, prevent erosion, and fix nitrogen. Avoid walking rows when wet and use raised beds or broadforks to reduce compaction and keep air flowing to roots.