
Can a simple strip of paper change how you plant tiny seeds and save hours of thinning?
Many gardeners lose tiny packets to scattering, crowded rows, and constant thinning. The easy solution is a homemade seed tape that places each seed at the right spacing so every plant gets room to thrive.
Real at-home methods include an egg-yolk adhesive on unbleached toilet paper and a flour-and-water paste on single-ply rolls. Both dry into strong strips you can label, store in jars or bags, and lay straight into prepared beds.
Why it works: narrow paper or paper towel strips with spaced dabs keep carrots and other small seeds from crowding. Use a ruler to match packet spacing, cover to packet depth, and keep soil evenly moist until sprouting.
Ready to gather a few supplies and plant cleaner rows? Learn step-by-step methods, wind-proof tricks, and storage tips so your rolls work on planting day. For a related planter idea, check this herb planter guide.
Key Takeaways
- Homemade strips place tiny seeds at correct spacing for neater rows.
- Egg yolk and flour paste both make durable adhesives for paper or toilet paper strips.
- Measure spacing with a ruler and label each roll for easy planting.
- Store rolls dry in jars, zip bags, or vacuum packs until planting day.
- Use narrow strips for carrots to reduce thinning and improve airflow.
Why Seed Tape Is the Smart Way to Plant Tiny Seeds Without Waste
Seed tape keeps tiny seeds at precise intervals so each plant has room to grow. It saves time and reduces thinning, making planting faster and more reliable on windy days.
A narrow strip of paper can stop tiny seeds from crowding and make every row count. Gardeners who buy pre-made seed tapes praise the neat results but note cost and limited varieties. Homemade strips deliver the same spacing at lower expense and let you choose exact cultivars.
Perfect spacing means less thinning and fewer spindly plants
How it helps: Placing dots to match packet spacing gives each seed one place to develop roots and tops. That reduces wasted seeds and crowded seedlings in beds of carrots or salad greens.
Faster rows in windy or busy seasons, from carrots to salad mixes
When time is short, lay the strip, cover to packet depth, and water. Tapes hold position in breezy conditions where loose seeds might scatter. Straight runs also make weeding and harvesting easier.
“I switched to homemade seed tapes and shaved hours off spring planting while using my favorite varieties.” — a practicing home gardener
| Feature | Commercial | Homemade |
|---|---|---|
| Cost | Higher | Low |
| Variety choice | Limited | Any vegetable or mix |
| Planting speed | Fast | Fast |
| Wind resilience | Good | Good (when covered) |

Hate wasting seeds this diy seed tape: step-by-step methods that work
With a few common supplies you can place every seed at the right interval and cut thinning time. These simple methods — egg yolk, flour paste, and a damp towel hack — fit small gardens and low-cost making seed tape projects.
With a few common supplies you can position every seed exactly where it should go.
Gather your supplies
Start with single-ply toilet paper or a sturdy paper towel, your chosen seeds, a small brush or toothpick, a ruler marked in inch intervals, a pen, and a bit of water.
Labeling materials and storage bags or jars finish the kit so finished rolls stay dry and ready.
Method A: Natural egg yolk “glue”
Dot tiny yolk spots about an inch apart guided by the seed packet. Press one seed into each dab, brush thin yolk lines along the top and below the row, then fold the paper lengthwise to seal.
Dry flat ~30 minutes, label the edge, and store in a mason jar or zip bag so the seeds stay viable.
Method B: Flour-and-water paste
Whisk flour with water to a runny paste. Dot at packet spacing with a brush, set a seed in each dot, run a thin paste line along the sealing side, fold, and dry fully.
Avoid an overly runny mix that soaks through single-ply sheets and weakens the paper.
Damp paper towel wind hack
Lightly mist a paper towel, sprinkle seeds, fold and cut into narrow strips for carrots and other row crops. Narrow strips reduce later thinning and help sprouts push through.
- Tip: Use a ruler and the packet spacing to ensure one-seed placement across the whole tape.
- Storage: Coil loosely, label crop and date, and keep in a cool, dry spot.

Planting, spacing, and real-world tips for better germination
Lay pre-spaced rolls in a prepared bed, cover to the packet depth, and keep the top inch of soil gently moist until sprouts appear. Narrow strips usually beat sheets for carrots and save time on thinning.
Set your rows carefully and your sprouts will thank you; good placement cuts thinning and speeds harvests.
How do you lay, cover, and water for reliable emergence?
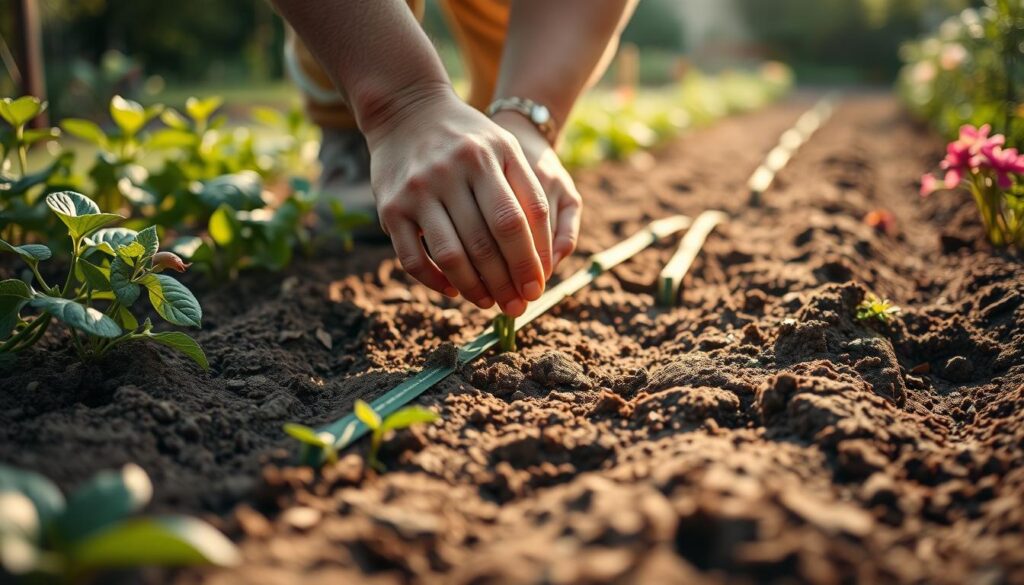
Prep a smooth row, unroll the strip, and place it where you want plants to grow. Lightly cover to the packet’s depth—about an inch for many small crops—and press the soil to settle the line.
Keep the top inch of soil evenly damp, like a wrung-out sponge. Water gently at first so the paper or paper towel fibers don’t swamp the sprout as it tries to push through.
Which works better: thin strips or full sheets?
Narrow strips win for root vegetables. For carrots, strips hold consistent spacing and cut thinning time. Full sheets can hide small doubles and often need extra work later.
For salad greens, slightly wider bands can work, but thin rows give the best air flow and even growth.
How do you handle wind, fragile tapes, and moisture challenges?
Avoid planting on breezy days. If gusts are likely, pause or pin strips with a light soil dusting as you go. Handle flour-based adhesives gently along the folded side to prevent separation.
If using a thicker towel, water a bit more cautiously so sprouts can break through. Close gates and block pets right after planting so young plants stay put while they root at home in your bed.
| Factor | Thin strips | Full sheets |
|---|---|---|
| Best crops | Carrots, narrow row vegetables | Some salad mixes, larger small greens |
| Thinning required | Low | Higher |
| Wind resilience | Good when covered | Fair, can shift more |
| Handling care | Moderate (folded side) | Moderate (bulk weight) |
For more on making stable plant lines, see the homemade seed mat guide. Small practices—steady water, careful placement, and narrow strips—save time and help every vegetable reach full size.
Conclusion
A short routine of measuring, dotting, and folding makes planting faster and cleaner.
Try a single method at first and learn from one row. Choose egg yolk on folded toilet paper for quick drying, or a thin flour-and-water paste for pantry simplicity. A damp paper towel fold works well in wind.
Label and coil finished seed tapes, store them dry in jars or zip bags at home, and note the packet spacing used. On planting day, lay the strip, cover to the seed packet depth, and keep soil gently moist.
Result: fewer thin rows, neater beds, and more reliable germination of tiny seeds. Keep experimenting with making seed tape widths and spacing to match your gardens and favorite varieties.
FAQ
What is a homemade seed tape and why use one?
A homemade seed tape is a strip of absorbent paper with individual seeds attached at set intervals using a simple adhesive. It helps place tiny seeds—like carrots and lettuce—accurately in rows so you don’t overplant or thin later. This method saves time, reduces crowding, and makes planting small seeds cleaner and more predictable.
What simple materials do I need to make seed strips?
Use thin paper such as toilet paper or a paper towel, your chosen small seeds, a ruler, pen, and a gentle glue. Common homemade adhesives include a flour-and-water paste or an egg-yolk mix. Dry the strips flat, label them, and store in a cool, dry place until planting.
How do I figure exact seed spacing for one-seed placement?
Check the seed packet for recommended spacing. Measure and mark the paper with a ruler, placing one seed at each mark. For example, carrots often need about 1–2 inches between seeds. Consistent spacing prevents crowding and reduces the need for thinning later.
Which adhesive works best: egg yolk or flour paste?
Both work well. Egg yolk creates a sturdy bond that handles slightly rough handling. Flour-and-water paste is classic, edible, and easy to mix. Use small dabs so seeds remain exposed enough to germinate, and let strips dry completely before storing or planting.
How do I plant and cover the strips for best germination?
Lay the strip in a prepared shallow trench at the depth recommended on the seed packet. Cover lightly with soil, firm gently, and water evenly. Keep soil consistently moist until seeds germinate. Avoid overwatering, which can wash seeds out or rot delicate tapes.
Can I use any paper for seed strips?
Choose thin, biodegradable paper that holds glue but breaks down in soil, such as toilet paper or a single-ply paper towel. Avoid glossy or heavily treated papers that won’t decompose. Thinner sheets let seedlings push through easily.
How should I dry and store prepared strips to keep seeds viable?
Dry strips flat on a baking sheet or tray in a cool, airy spot until fully set. Label each strip with seed type and date. Store in a sealed envelope or airtight container in a cool, dark place—refrigeration can help for some seeds, but check packet storage guidelines first.
Will seed strips hold up in windy or rainy conditions?
Thin strips can be vulnerable to wind and heavy rain. Plant them in a slightly sheltered bed or weigh soil over the trench to anchor the tape. For exposed sites, consider thicker paper or planting on a calm day to avoid tape displacement.
How do I handle mixed or salad-seed packets with varying spacing needs?
For mixes with small, similar-spacing seeds, lay them out according to the most common spacing on the packet. For mixed varieties with different needs, separate them into individual strips so each type gets the correct spacing and depth.
Can I make long seed strips for full rows? Any tips?
Yes. Work in manageable lengths, keeping marks and spacing consistent. Roll finished strips loosely and store flat if possible to prevent creasing. When planting long rows, unroll carefully into a shallow trench, then cover and water to avoid shifting seeds.