
Is Compost Tea a Miracle Grow for Your Garden? A Look at the Science

Can a bubbling, aerated brew really change plant health, or is that belief more hopeful than proven?

Table of contents

This introduction sketches what the brew is, when it helps, and why realistic expectations matter.

Definition first: the method is a living, aerated infusion made by steeping quality organic material in water while pumping air for several days. It produces beneficial microbes taken from the starting material and can be sprayed or poured onto beds and plants.

Results hinge on simple factors: the source mix, clean water, steady aeration for 3–5 days at night temps above 60°F, and fast use to avoid anaerobic problems. Add-ins like liquid humate, fish emulsion, and unsulfured blackstrap molasses are common, but they do not replace fertilizer.

Expect better microbial diversity, possible disease suppression, and improved nutrient cycling when used with balanced fertility. Practical use means diluting roughly 1 cup per gallon of rainwater, spraying at dusk, or drenching soil for steady vigor.

Key Takeaways

  • It’s a living brew: adds biology to beds and plants, not instant nutrient replacement.
  • Quality matters—start with trusted organic material and soft water.
  • Use fresh within days; aerate 3–5 days when nights stay above 60°F.
  • Dilute and spray at dusk or drench soil to seed microbes safely.
  • Works best alongside balanced fertilizer and good cultural care.

Compost tea, science, and results: what gardeners can realistically expect

An aerated brew captures living bacteria and fungi from finished material, making those organisms portable for field use. This lets gardeners apply a living inoculant to foliage or beds while keeping expectations grounded in science.

What it is and how it works

Define it simply: compost tea is an aerated infusion of finished compost in water. A mesh bag holds the finished compost while an aquarium bubbler runs for 3–5 days to build a living suspension.

Microbes, Brix, and plant health

Bacteria and fungi from the brew colonize the rhizosphere and leaf surfaces. These microbes help cycle nutrients and support plant defenses. Some growers report slight rises in sap Brix and reduced pest feeding after regular applications, though responses vary by crop and care.

Limits and practical controls

Quality depends on inputs: high-grade or OMRI-listed finished compost yields better results. Cool temperatures, anaerobic lapses, or long storage reduce benefits and can cause off-odors. Remember: the infusion adds biology, not a quick dose of soluble chemicals or fertilizer.

Use tips: apply fresh, dilute to about 1 cup per gallon of rainwater, spray at dusk for leaf work, or drench soil to boost root-zone microbes. Pair with a soil-test‑informed fertilizer plan to support lasting growth.

A close-up view of a clear glass jar filled with a rich, dark brown liquid. The liquid is lightly fizzing and bubbling, with tiny air bubbles rising to the surface. The jar is illuminated from the side, casting warm, soft lighting that highlights the organic, earthy tones of the compost tea. The background is blurred, creating a sense of focus on the jar and its contents. The overall mood is one of natural, healthy vibrancy, inviting the viewer to imagine the powerful benefits this compost tea could bring to a thriving garden.

How to make compost tea step-by-step: tools, ingredients, water, and timing

Start with a simple, reliable setup so biology can thrive while you brew. This section lays out clear gear, exact ingredients, and the brewing timeline so you can make compost tea safely and repeatably.

Gather gear first:

  • Bucket: one 5-gallon bucket filled about three-quarters with water.
  • Bubbler: aquarium pump with air stone, an old sock or pantyhose, a stick and clip, a fine mesh sieve, and a sprayer.

Measure ingredients for a 5-gallon batch: 2 cups finished compost, 2 tbsp liquid humate, 2 tbsp liquid fish emulsion, and 2 tbsp unsulfured blackstrap molasses.

Use rain water when possible. If you must use tap water, let it sit in the sun a full day to off-gas chlorine. Fill the bucket, suspend the filled sock mid-bucket, add the humate, fish emulsion, and molasses, then drop the air stone to the bottom.

Run the bubbler continuously for 3–5 days, starting when nightly lows stay at or above 60°F. After brewing, strain through the sieve into your sprayer and dilute—typically 1 cup of brew per 1 gallon water—then apply to soil or plants soon after brewing. Clean the bucket and gear after use to keep results consistent.
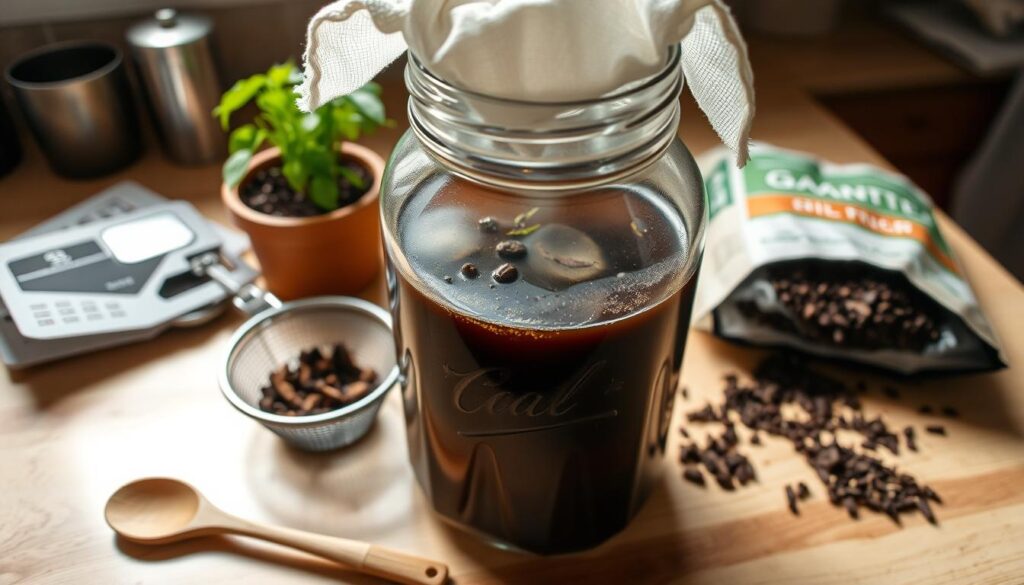
A well-lit kitchen counter with a large glass jar filled with steaming compost tea, surrounded by various gardening tools and ingredients such as a mesh strainer, a wooden spoon, and a bag of compost. The jar has a cheesecloth cover, and a few small leaves or herbs float in the dark, nutrient-rich liquid. The scene is captured with a slightly overhead angle, using a wide-angle lens to showcase the entire setup. The mood is one of experimentation and anticipation, as if the viewer is about to embark on a gardening project.

How to use compost tea in the garden: dilution, spraying vs drenching, and frequency

Small choices—dilution, timing, and water quality—shape how well the brew helps plants. Use a gentle routine so microbes can establish without stressing leaves or roots.

Dilution made simple: mix 1 cup of compost tea per 1 gallon water, ideally with rain water. This ratio gives a biology-forward dose safe for most beds and containers.

When to spray vs drench

Foliar spray at dusk when UV is low and no rain is expected. That timing helps microbes settle on leaves overnight.

For soil work, drench along the drip line and across bed surfaces to seed the soil zone. Heavy feeders, like roses, can tolerate mixes up to half brew, half water occasionally.

Seasonal cadence

Wake beds in early spring with a broad soil application. On production annuals, apply every two weeks through July. Backyard plots benefit from monthly use. Treat lawns in spring and fall for best effect.

Safety and storage

Properly diluted brew rarely burn plants. Use fresh batches within a few days. Do not store without aeration—anaerobic shifts reduce quality and can smell bad.

Quick tips: avoid municipal chlorinated water if possible; let tap sit or use rain water. Track when compost tea used or tea used as a drench so you can note responses and pair applications with a soil-test informed fertilizer plan.
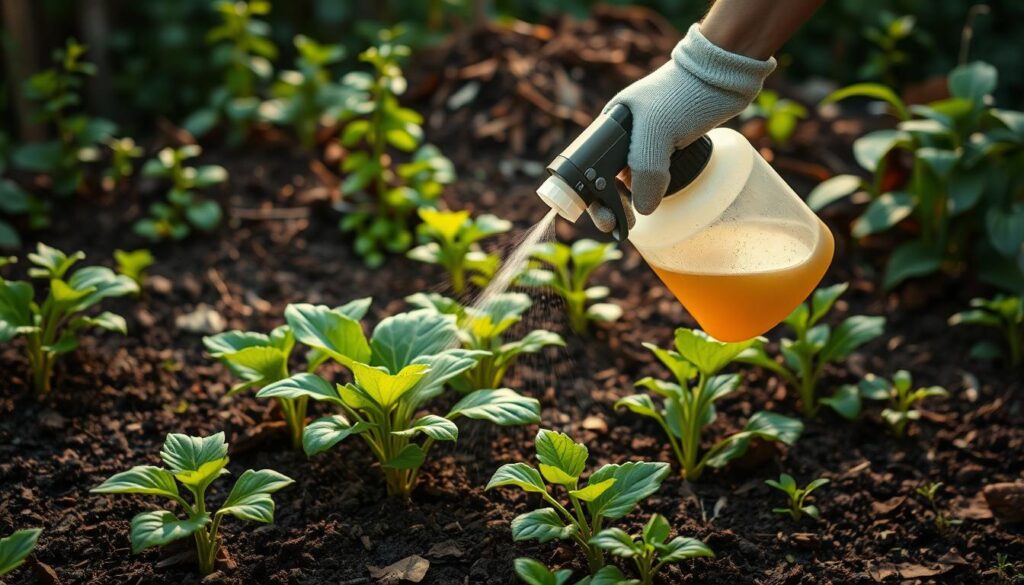
A lush garden scene, with a person in the foreground carefully spraying a diluted compost tea solution onto the soil around plants. The person is wearing gardening gloves and uses a handheld sprayer with a fine mist. The plants in the middle ground are vibrant and healthy, their leaves glistening with the applied compost tea. In the background, a well-maintained compost pile is visible, hinting at the source of the nutrient-rich tea. The lighting is soft, natural, and diffused, creating a serene, earthy atmosphere. The scene conveys the care and attention required to properly apply compost tea to nourish a thriving garden.

compost tea miracle grow your garden look: comparing organic tea to Miracle-Gro and DIY plant foods

Compare fast nutrient feeds to a biology-first approach so you pick the right tool for the job. Use living applications to improve nutrient cycling and save quick‑acting fertilizers for targeted corrections.

Below is a simple DIY concentrate recipe that mimics store fertilizer effects but is made at home.

How to mix a DIY “Miracle‑Gro” style concentrate

Recipe: 1 gallon water, 1 tbsp Epsom salt, 1 tsp baking soda, 1/2 tsp household ammonia. Mix and store airtight.

Application: once a month, mix 1/8–1/4 cup of the concentrate with 4 cups water and feed plants. Watch for salt stress and reduce dose if leaves show edge burn.

Low‑effort plant foods from home

Fish tank water gives nitrogen and trace elements when you dump a portion during cleaning.

Kitchen-scrap soak example: eggshells plus coffee grounds in rainwater, shaken daily for a week, then strain and add tablespoons to pots.

Weed soak, manure, and slow‑release options

Steep fresh weeds in rainwater for about a week and dilute 1:10 before use. Classic inputs like manure, finished compost, mulch, and bone meal build long-term soil food and structure.

“Use fast-acting products when tissue tests show a need; rely on living inputs for steady soil health.”

Option Main benefit Speed Risk
DIY concentrate Quick nutrient boost Fast Soluble salts, leaf burn if overused
Fish tank water Free N and micros Moderate Variable strength
Weed soak Cheap, easy feed Moderate Strong smell
Manure/compost Long‑term soil food Slow Need to be well finished

Over‑fertilization signs: white crust on the soil, yellow margins, brown tips, stunted growth. If you see these, flush pots or beds with plain water to reduce soluble salts.

Smart mix: use living applications regularly for nutrients soil cycling, and add concentrated plant food sparingly for measured corrections. If you make compost, you reduce dependence on commercial products and chemicals while controlling input quality.
A vibrant still life composition featuring an assortment of organic plant food products. In the foreground, a glass jar filled with a rich, earthy compost tea mixture sits alongside a small bag of natural fertilizer pellets. In the middle ground, a variety of garden tools, such as a hand trowel and pruning shears, are arranged neatly. The background showcases lush, verdant foliage, casting a warm, natural glow over the scene. The lighting is soft and diffused, creating a sense of tranquility and highlighting the natural textures and colors of the organic materials. Captured with a crisp, high-resolution lens, the image conveys the wholesome, nurturing essence of homemade plant care solutions.

About the Author

Garden Expert (Ethan Green) is your green-thumbed guide at The Garden Haven. With years of hands-on experience in home gardening, greenhouse care, and sustainable planting, Garden Expert shares practical tips and expert advice to help you grow healthier, happier gardens—season after season.

Editorial Process Note

Just like a healthy garden, our content is carefully nurtured. Every tip and technique shared on The Garden Haven comes from years of hands-on experience. Before we publish an article, our team "weeds out" any inaccuracies by checking facts against trusted horticultural sources. We regularly revisit our articles to keep them fresh and up-to-date, ensuring you always have the best information for a thriving garden.

Conclusion

Keep the process simple and repeatable: good inputs, a clean 5‑gallon bucket, and steady aeration for about 3–5 days will give the best results. This approach brings living biology to the soil and helps plants use nutrients more effectively.

Use fresh batches, dilute at 1 cup per 1 gallon water, and apply at dusk or as a drench. Favor captured rain or dechlorinated water and clean gear after each run.

Pair the practice with a soil‑test informed fertilizer plan and organic fertilizer inputs. A splash of fish emulsion can add gentle nutrition without heavy salts.

Make compost at home and learn to make compost tea so you control quality. This post is a practical springboard—brew smart, track vigor, and celebrate steady growth.

FAQ

Is compost tea really like Miracle-Gro for plants?

Compost tea delivers living microbes and some nutrients to soil and foliage, while Miracle-Gro is a concentrated synthetic nutrient mix. Tea feeds biology and improves soil structure and disease resistance when brewed and applied correctly. Miracle-Gro gives a quick, predictable nutrient boost but won’t build long-term soil life. Choose biology for resilience and slow improvement; choose synthetic feeds for fast greening.

What exactly is compost tea?

Compost tea is an aerated infusion made by steeping finished organic material in water to extract beneficial bacteria, fungi, and soluble compounds. Properly brewed, it’s alive with microbes that help nutrient cycling, raise Brix in plants, and can suppress some foliar diseases by outcompeting pathogens.

How does microbial life in the tea help plants and soil?

Beneficial microbes break down organic matter into usable nutrients, improve soil structure, and create a biological barrier against pathogens. Higher microbial activity often correlates with better nutrient uptake and healthier plants. Measuring Brix can hint at plant metabolic health, but it’s not a complete test of soil biology.

What limits the effectiveness of a brew?

Results depend on the quality of inputs, water, aeration, and brewing time. Poor compost, chlorinated water, or anaerobic conditions can produce low-benefit or harmful brews. Fresh use is best; stored tea loses viability and can develop anaerobes that stress plants.

What gear do I need to make a safe aerated batch?

A simple checklist: a 5-gallon bucket, an aquarium air pump and stone, a breathable bag (pantyhose or sock) to hold the finished material, a stirring stick and clip, a fine sieve for applying solids, and a pump sprayer or watering can for delivery.

Which ingredients matter most and why?

Use fully finished organic material, unsulfured blackstrap molasses as a food source for microbes, optional fish emulsion for quick nutrients, and liquid humates or humic acid to stimulate biology. Poor-quality inputs will limit microbe diversity and function.

What water should I use for brewing?

Rainwater is best because it’s free of chlorine and chloramine. If you must use tap water, let it sit uncovered 24–48 hours to off-gas chlorine, or use a carbon filter. Avoid softened water high in sodium.

How long should I run the bubbler and at what temperature?

Aerate continuously for about 3–5 days. Aim to brew when night temperatures remain at or above roughly 60°F so microbial activity stays robust. Shorter or colder brews will yield fewer active microbes.

What’s a basic brewing walkthrough?

Suspend a bag of finished material in a filled bucket, start the bubbler, add a small molasses dose and any liquid amendments, and keep aeration steady. After 3–5 days, strain the liquid and use immediately for best results.

How should I dilute and apply the finished brew?

A common dilution is about 1 cup of brew per gallon of water for foliar and soil applications. Use rainwater when possible for the mix. Apply foliar sprays at dusk to limit UV kill-off and do soil drenches around roots for biological enrichment.

When is foliar spray better than soil drench?

Foliar spray helps establish beneficial microbes on leaves and can suppress some diseases when applied in the evening. Soil drench targets root-zone biology and supports nutrient uptake and soil structure. Use both strategically depending on the need.

How often should I use it through the seasons?

Wake beds in spring with a brew, then apply roughly monthly for garden beds. Lawns benefit from applications in spring and fall. Adjust cadence based on plant response, soil tests, and seasonal growth patterns.

Can a brew burn plants or be unsafe?

Fresh, aerobic tea rarely burns, but anaerobic or fermented brews can produce phytotoxic compounds. Avoid using stale or foul-smelling tea, don’t store for long, and test on a small area before broad application.

Is there a DIY “Miracle-Grow” style homemade feed recipe?

Some gardeners use simple mixes like water with small amounts of Epsom salt, baking soda, or dilute household ammonia for quick fixes, but those supplies provide limited biology and risk salt buildup. They’re nutrient-focused rather than biologically restorative.

What other homemade fertilizers can I use with or instead of a brew?

Options include fish-tank water (rich in nitrates), strained kitchen-scrap teas, or weed-infused solutions. These supply nutrients and microbes to varying degrees; quality and consistency will vary compared with a well-brewed infusion.

How do I choose between nutrient feeds and biological teas?

If plants need a fast nutrient boost, a soluble feed is efficient. If your goal is long-term soil health, resilience, and reduced disease pressure, prioritize biologically active brews. Often a combined approach—biology plus targeted nutrients—works best.

What are signs of over-fertilization and how do I fix it?

Watch for leaf tip burn, yellowing, slowed growth, or salty crusts in soil. Flush with ample water, stop further feeding, and amend with organic matter or gypsum if sodium is an issue. Test soil before resuming applications.

Can I add fish emulsion or manure to the brew?

Small amounts of fish emulsion boost nutrient content, but fresh manure risks pathogens and should be fully composted before use. Use only finished, well-aged organic inputs to protect plant health and reduce human/animal health risks.

How quickly should I use finished brew and how long can I store it?

Use within 6–12 hours for peak microbial activity. Short-term storage in a cool, shaded spot may be okay for a day, but viability and safety drop fast. Discard any tea that smells rotten or develops a slime layer.