
Can a small patch of plants give you fresher cups and simpler care than a full-scale yard? This guide helps you design a cozy, productive plot or container setup that fits your life and climate.
Imagine harvesting warm, fragrant leaves in the cool of the morning. Start by choosing between traditional Camellia sinensis and a lively herbal mix—mint, lemon balm, chamomile, tulsi, and roselle. Each option brings different care needs and a distinct flavor profile for your mug.
Camellia prefers USDA Zones 7–9, acidic, well-draining soil, and some afternoon shade in hot summers. Herbs pull double duty: they scent your blends and support pollinators while helping with pest control. Use containers or grow bags if winter moves in; they drain well and can be shifted indoors.
For practical steps on herb choices and companion planting, discover garden herbs that pair well with Camellia or stand alone in herbal blends. Regular morning harvests and gentle air-drying keep leaves vibrant and ready for months.
Key Takeaways
- Decide between Camellia sinensis or an herbal mix based on climate and flavor goals.
- Plant in acidic, rich soil and use partial shade where summers get hot.
- Containers offer mobility and winter protection for colder zones.
- Harvest in the morning and air-dry herbs to preserve aroma and taste.
- Choose herbs like basil and calendula for pest help and pollinator support.
What a Tea Garden Looks Like: From Camellia sinensis to Herbal Tea Beds
A single planting style can either center on Camellia sinensis shrubs or celebrate a mixed bed of aromatic herbs and flowers. Each choice brings distinct care needs, harvest rhythms, and sensory rewards.
Classic, caffeinated plantings use evergreen shrubs for repeated leaf harvests and a tidy structure. Camellia sinensis thrives in rich, moist, acidic soil and suits USDA Zones 7–9. These shrubs need pruning and gentle training to keep harvests healthy.
Herb-forward beds favor seasonal color, scent, and pollinator visits. Mint, chamomile, lemon balm, tulsi, and roselle deliver caffeine-free infusions and often help deter pests. Chamomile self-seeds; mint spreads aggressively and fares best in pots.

“Design plants to serve both the kettle and the eye — structure for year-round form, flowers for summer scent.”
- Structure vs. seasonality: shrubs offer backbone; herbs add texture and bloom.
- Maintenance: expect more pruning with shrubs, more deadheading with herbs.
- Practical tip: plan paths to harvest without stepping on beds and try herb garden layouts for small spaces.
What’s best way grow tea garden look
Sketch your space, note light and wind, and group similar thirsty and drought-tolerant plants together. This simple planning reduces chores and keeps each plant happy.
Map where 6–8 hours of light falls and mark hose access. Aim for a sunny spot but allow afternoon shade in hot summers to protect tender leaves and preserve flavor.
Choose an area you can visit daily. Close access makes watering, pinching, and harvests part of your routine.

- Sketch the yard or balcony to plan height tiers and access lanes.
- Aim for 6–8 hours of light; accept a little afternoon shade in heat.
- Group similar plants by water needs to simplify care.
- Keep paths wide enough for a basket or watering can to protect stems.
- Tuck easy-win containers near doors for fresh cups and daily attention.
“Start small, observe what thrives, and expand with confidence.”
Choose the Right Spot: Sun, Wind, Water, and Access
Find a spot that catches 6–8 hours of reliable sun while offering relief from harsh afternoon heat.Place your beds where wind is buffered and water is easy to reach for daily care.
Find a sunny patch that gives long morning rays but shelters leaves from late-day scorch. Track the sun’s arc for a week to confirm where true full sun falls and where shade appears in the afternoon.
How to map light and shade
Mark the hours of direct sun on a plan or with simple flags. Note where reflective heat from walls concentrates and choose areas that avoid low, soggy pockets after storms.

Protect from wind and secure water access
Pick a flat, well-drained spot with easy hose or spigot access so daily watering is simple. Use fences, hedges, or building orientation to block high winds that dry plants and strip leaves of air and moisture.
- Prioritize morning sun and light afternoon shade in hot regions to preserve aromatic oils and prevent scorch.
- Place taller, wind-tolerant plants on the windward side to shield delicate herbs and keep the layout intuitive for quick harvests.
- Create stable, non-slip paths and keep beds near the kitchen to cut missed watering windows and encourage daily picking.
“Adjust protection seasonally—sun angles and wind shift, so revisit the spot each spring and fall.”
For layout ideas and plans that fit small yards and containers, explore practical tea garden plans to match your space and sun pattern.
Soil and pH Made Simple: Build a Rich, Well-Draining Base
Before planting, measure pH and nutrient levels so you can target fixes that protect roots and flavor. This step saves time and prevents guesswork when preparing beds or containers for Camellia sinensis and companion herbs.
Start with a digital soil test kit to read pH and NPK. Camellia prefers an acidic range of 4.0–5.5. pH outside that window can stunt growth and dull leaf aroma.
Simple fixes that improve structure and drainage
- Test first: check pH and NPK, then re-test after changes.
- Add compost or aged manure to build organic matter and feed soil life.
- Mix perlite or vermiculite into heavy ground to prevent waterlogging of fine feeder roots.
- Keep moisture even but avoid soggy ground; mulch helps regulate temperature and evaporation in many climates.
- Use synthetic starter fertilizer sparingly, then shift to organic inputs to support long-term soil health.
- Separate acid-loving zones from neutral beds to simplify care and steady leaf production.
Smart Layouts: Beds, Containers, and Small-Space Designs
Plan for access and light, then choose beds or pots that match your routine and space. Small changes in placement deliver better harvests and healthier plants.
Lay out beds and pots so every plant gets light and you can reach harvests without stepping on the ground. Raised beds about 30 inches wide keep stems safe and make picking easy.
Against a fence — how should you stage plants?
Place tall perennials like bee balm and echinacea at the back of a fence-line bed. Put low growers in front for sun access and simple picking.
In open plots — where do tall plants go?
Set taller plants on the north side so they do not cast shade on shorter herbs. This preserves full sun for low rows.
How can containers and grow bags help patios and decks?
Use grow bags (2–200 gallons) and pots to fine-tune drainage and mobility. Small bags move indoors for winter and larger bags give air-pruning for strong roots.
What does square-foot planting offer for tiny plots?
Square-foot grids maximize space, speed rotations, and make watering and succession planting simple. Frame edges with spilling herbs to soften borders and invite pollinators.
- Alternate textures: pair upright lemon grass with mounding lavender for airflow.
- Paths: place harvest lanes every 2–3 feet for easy access.
- Group by need: cluster pots by water requirements and use self-wicking trays where helpful.

“Design so you can reach every pot and bed without stepping on the soil—your plants will reward you with better growth.”
| Layout Type | Suggested Width / Size | Ideal Placement | Notes |
|---|---|---|---|
| Fence-line bed | 30 in. bed | Tall at back, low in front | Easy harvest access; protect roots from trampling |
| Open plot | Variable rows | Taller plants on north side | Prevents unwanted shade on short herbs |
| Grow bags / pots | 2–200 gal options | Patios, decks, windowsills | Great drainage; small pots move indoors for winter |
| Square-foot bed | Grid cells (1 ft.) | Small yards / balconies | Maximizes spacing, rotations, and succession plantings |
Pick Your Plants: Caffeinated Tea and Herb Staples
Start with a small palette of reliable plants that suit your sun, soil, and seasonal rhythm. Mix perennials and annuals so you have steady harvests from spring through the first frost.
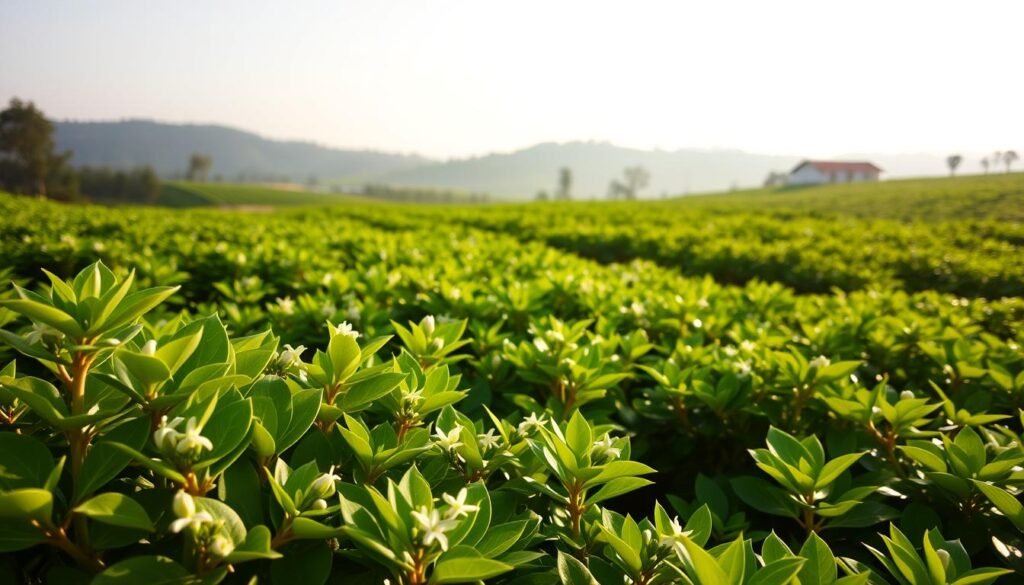
Camellia sinensis basics for U.S. zones and container culture
Camellia sinensis thrives in USDA Zones 7–9. In colder climates, keep this plant in a pot and move it indoors for winter. Prune for shape and harvest the youngest leaves for classic green or black infusions.
Mint family choices and containment tips
Peppermint and spearmint are vigorous and spread fast. Contain mint in a sturdy pot to prevent takeover, and harvest often to keep aroma strong.
Chamomile, lemon balm, and tulsi: soothing staples
Chamomile self-seeds and attracts pollinators; pick flowers early in the morning. Lemon balm is a vigorous perennial—divide clumps every few years to renew vigor. Start tulsi indoors eight weeks before the last frost and avoid temps under 50°F.
Roselle, lemongrass, and extra flavors
Roselle performs as an annual in most U.S. climates and can produce large yields of tart calyxes. Lemongrass prefers sun and well-drained soil—treat it as an annual where winters freeze. Add basil for spice and companion benefits, and always read plant tags for mature sizes to prevent shading between neighbors.
- Choose plants by sun and pot size for easy care.
- Mix perennials with annuals for continuous leaves and blooms.
- Contain aggressive species and plan winter moves for tender pots.
Companion Planting for Flavor, Pollinators, and Fewer Pests
Plant companions that attract helpful insects and add scent, so each bed serves flavor and function. Thoughtful pairings boost yields and cut pest pressure without extra sprays.
Use a small palette of reliable allies to keep your plots productive from spring to fall.
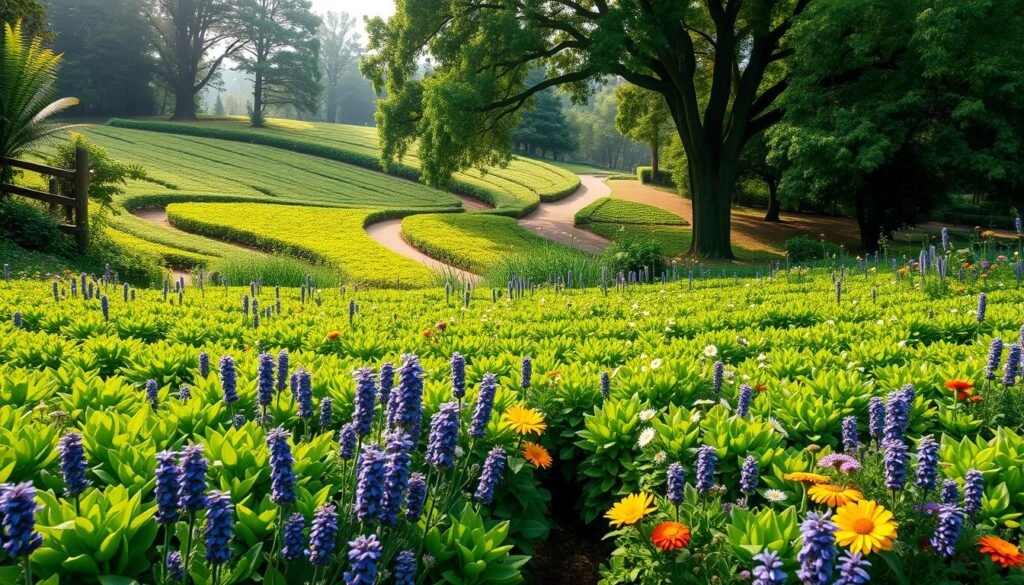
Calendula, basil, and bee balm: allies for health
Pair calendula, basil, and bee balm to draw pollinators and predators that reduce pests. These plants supply nectar for beneficials and add pleasant flavor to blends.
Basil deters some pests and pairs well in cups. Bee balm offers long-blooming flowers that keep pollinators working the bed.
Edging and trap crops: thyme, oregano, and nasturtium
Edge raised beds with thyme and oregano to soften lines and shade soil. Nasturtium acts as a trap crop for aphids and adds bright flowers to harvest.
- Interplant herbs near vulnerable plants to raise beneficial insect traffic during bloom.
- Mix aromatic herbs to confuse pests and improve resilience.
- Stagger bloom times to keep helpful insects visiting from spring through fall.
- Pinch companions often to keep them compact and productive.
“Companion planting makes every square foot work double-duty—food for you and shelter for beneficials.”
| Companion | Function | Use in blends |
|---|---|---|
| Calendula | Attracts pollinators, deters some pests | Petals for color and mild flavor |
| Basil | Repels flies and beetles | Leaves for savory infusions |
| Bee balm | Long bloom, attracts native bees | Floral note, mint family aroma |
| Nasturtium | Trap crop for aphids | Peppery flowers and leaves |
Observe and adjust: move companions near the plants that need the most help each season. For extra reading on blending herbs and layout, see our tea garden guide.
Planting Steps: Starts vs. Seeds, Spacing, and Hardening Off
Decide which plants to start from seed and which to buy as starts to save time and space. Give tender seedlings a warm, steady start indoors and a careful hardening-off routine so they thrive after transplant.
Begin sowing tender herbs under lights about two months before your last frost date. Tulsi does well started ~8 weeks out; use heat mats for quicker, more uniform germination.

When to start seeds and protect young growth
Sow slow or heat-loving herbs early; buy mint and lemon balm as starts to skip extra time.
- Sow tulsi, chamomile, and roselle in clean trays with a sterile mix.
- Bottom-water and use humidity domes to cut damping-off risk.
- Up-pot seedlings when roots reach tray edges to support steady growth.
How to harden off and space for airflow
Harden off transplants over 7–10 days by increasing outdoor time each day. This reduces leaf scorch and transplant shock.
Follow spacing on seed packets to keep air moving and disease low. Crowded plants slow growth and invite problems; adjust spacing for your climate’s humidity.
“Stagger plantings for continuous harvests and keep a simple log of sow dates and first picks to improve timing next season.”
| Task | When | Why it matters |
|---|---|---|
| Start seeds indoors | 6–8 weeks before last frost | Gives roots time to develop and shortens outdoor establishment time |
| Up-pot seedlings | When roots reach tray edge | Prevents root bind and supports steady growth |
| Harden off | 7–10 days before transplant | Reduces shock and prevents leaf scorch |
| Transplant & mulch | After last frost into prepared soil | Stabilizes moisture and temperature for strong leaf production |
Watering and Care Through the Seasons
Establish a steady watering rhythm and protect pots and beds from extremes. Simple habits—deep soaks, smart irrigation, and seasonal prep—keep plants healthy all year.
Track soil moisture and start with two to three thorough waterings weekly, then adjust by feel and weather. In hot, sunny stretches increase frequency and check pots more often; containers dry faster than beds.
How should you schedule and deliver water?
Favor deep, even soakings over frequent light sprays. Use drip irrigation or bottom-water pots to send water straight to roots and cut foliage wetness.
- Establish a routine: check soil, then water deeply to encourage deep root growth.
- Use drip lines or soak hoses to target root zones and save time.
- Flush containers every few months to remove salt buildup, then return to regular cycles.
How do you handle heat, drought, and winter prep?
During heat spikes, add mulch and use shade cloth to protect delicate leaves and preserve aromatic oils. Move vulnerable pots to cooler, sheltered spots if daytime temps climb or night heat stays high.
In fall, tidy perennials, cut back lightly, and reduce watering as growth slows. For winter, bring small pots indoors or tuck containers close to warm walls. Use frost blankets on cold nights and secure edges so wind cannot lift them.
“A short journal of what you water and when helps you refine timing—season by season.”
Inspect emitters and hoses mid-season to confirm even coverage. Over time you’ll find established perennials need less attention than new transplants; tune your schedule and keep notes for next year.
Organic Pest and Disease Management
Small routines—pruning, cleaning, and mulching—stop many pests and diseases early. Combining cultural care with biological controls protects plants and preserves flavor in leaves.
Start with prevention. Prune for good airflow, remove diseased foliage, and keep tools sanitized after use. Mulch reduces soil splash that spreads fungal spores and helps steady moisture.
Netting, beneficial insects, and low tunnels
Use insect netting at the first sign of pressure—it’s a quick, chemical-free barrier. Attract natural predators like green lacewings and pirate bugs by adding diverse blooms and shelter plants.
Practical daily habits
- Prune to open the canopy and improve air circulation around the plant.
- Scout weekly for chewing, stippling, or curling—early detection saves crops.
- Water at the base to keep foliage dry and reduce leaf-spot issues.
- Rotate containers and refresh potting mix to interrupt pest cycles.
- Install low tunnels paired with netting or frost blankets for quick protection.
“Hand-pick minor pests and remove heavily infested stems away from the garden to cut reinfestation.”
| Strategy | Why it works | When to use | Quick tip |
|---|---|---|---|
| Sanitation | Removes inoculum and pest habitat | Weekly, and after harvest | Clean tools with alcohol between beds |
| Mulch | Limits soil splash and stabilizes moisture | At planting and seasonal refresh | Use organic mulch 2–3 inches deep |
| Beneficials & netting | Biological control + physical barrier | At first pest signs or during bloom | Plant companion flowers to sustain predators |
| Low tunnels | Portable protection from pests and frost | Spring and fall transitions | Pair with breathable netting for airflow |
Harvest, Dry, and Store: From Garden to Teacup
Harvest in the early morning after dew dries to preserve aroma and delicate oils. Then dry and store carefully so leaves keep their flavor through the year.
Harvest during the pale light of morning once the dew lifts to capture the fullest aroma in every leaf. Pick young leaves and half-open flowers for the cleanest flavor and highest aromatic oils. Pinch just above nodes to keep plants productive and to shape tidy canopies for ongoing harvests.
When should you pick leaves versus flowers?
Leaves harvested early give bright, fresh character; flowers are best at half-open stage for scent and color.
- Target morning picks after dew evaporates for peak aromatics.
- Young leaves often carry the most flavor and, in spring, higher caffeine.
- Gather half-open flowers for fuller scent without petal drop.
How should you dry—air, dehydrator, or quick methods?
Air-dry small bundles in a dark, ventilated spot to retain oils. Use mesh trays so sprigs don’t clump and turn them gently for even airflow.
For moisture-prone herbs like basil and mint, a dehydrator speeds safe drying. If you use quick-dry options (oven on lowest setting or a car-in-bag), watch closely to avoid scorching.
Which jars, labels, and shelf-life rules matter?
Test dryness by snapping stems cleanly. Transfer fully dry leaves to airtight jars kept away from light and heat. Label each jar with the plant name and year so you rotate stock and enjoy the freshest cups.
- Brew a sample after drying to confirm aroma and adjust methods next time.
- Add a spoonful of honey to a freshly brewed cup to lift herbal notes, if you like a softer finish.
- Most dried herbs and leaves keep well up to a year; avoid freezing leaves because temperature swings dull flavor.
“A short drying diary helps you refine bundle size, timing, and storage for consistent results.”
For more on setting up harvest routines and drying designs, see a practical herbal tea garden reference that pairs well with these steps.
Brew Inspiration: Simple Homegrown Tea and Iced Infusion Ideas
Fresh garden picks turn into easy, bright cups you can make hot or cold. These four recipes use simple timing and common pantry items to highlight mint, lemon, chamomile, lemongrass, and roselle.
Mint‑lemon honey (hot or iced)
Steep a handful of fresh or dried mint leaves for 10 minutes. Add sliced lemon and a drizzle of honey to taste.
Serve over ice for a cooling pitcher, or pour hot for a soothing cup. Use peppermint for a sharper note if you like.
Lemongrass‑ginger with a citrus finish
Simmer chopped lemongrass and sliced ginger in water for 10 minutes.
Turn off heat, add lemon juice, and steep covered for 10–20 minutes. Strain and chill or sip warm for a bright, spicy profile.
Roselle iced concentrate with lime
Make a concentrate by simmering roselle calyxes with sugar, cinnamon, and a slice of ginger.
Cool, dilute with cold water, and finish each cup with fresh lime. Keep concentrate refrigerated for quick pitchers.
Creamy chamomile latte
Steep chamomile flowers for 10 minutes, then strain.
Warm and froth milk with a pinch of cinnamon and a touch of vanilla. Combine with the chamomile infusion and sweeten with honey if desired.
“Start with young leaves for gentle flavor and older leaves when you want bolder, spiced blends.”
- Tip: Keep water just off the boil for tender herbs; hotter water suits ginger and roselle.
- Try: a few basil leaves in citrus blends to add subtle herbal depth.
- Make ahead: extra concentrate stores for quick iced servings and consistent cups.
| Recipe | Steep / Simmer Time | Finish | Serve |
|---|---|---|---|
| Mint‑lemon honey | 10 minutes | Lemon slices + honey | Hot or iced |
| Lemongrass‑ginger | Simmer 10 min; steep 10–20 | Fresh lemon juice | Hot or chilled |
| Roselle concentrate | Simmer 10–15 min | Sugar, cinnamon, ginger; finish with lime | Iced (dilute concentrate) |
| Chamomile latte | Steep 10 minutes | Frothed milk, cinnamon, vanilla, honey | Hot, creamy cup |
Conclusion
Design around your daily routine and climate so plants reward small, regular actions with steady harvests.Focus on full sun where possible, rich, draining soil, and a simple schedule of watering, pinch-harvests, and winter protection.
Start small and place pots and beds where you will use them. Choose easy‑care herbs like lemon balm, mint, and chamomile as anchors, then add basil, tulsi, or roselle for more flavor.
Group pots by water needs, protect beds from strong wind, and aim for 6–8 hours of sun with a little afternoon relief in heat. Refresh compost yearly and move tender pots before winter to keep perennials safe.
Keep a short routine: test soil, water deeply when needed, harvest young leaves, and dry them for jars. Over years this steady care builds a productive, fragrant tea garden that invites family outside and fills your cup.