
Ever wondered why some beds stay healthy while others struggle? A smart rotation can break cycles of recurring trouble and keep soil life thriving.
This four-year plan aims to cut down on pest flare-ups and recurring pathogens while helping your plants produce steadier yields. Start by watching your beds, then use gentle moves like hand-picking, barriers, and pruning before reaching for sprays.
The approach is simple and fits a small garden or a couple of raised beds. Map plant families, move crop groups each year, and add mulching, interplanting, and sanitation as supportive layers.
Expect clearer decisions and faster responses in the growing season. Protect beneficial organisms, treat only when needed, and keep a few gentle solutions on hand. Later sections give seasonal tasks, targeted tactics for common pests, and recordkeeping tips to make planning easy.
Key Takeaways
- Use a four-year rotation to deny pests and recurring pathogens their hosts.
- Begin with observation and least-toxic controls before escalating.
- Protect soil life and beneficial organisms while you manage threats.
- Fit the plan to small beds; it scales as your garden grows.
- Keep simple records, map beds, and move plant families annually.
Why this easy crop rotation plan works to solve pest and disease problems
Rotation works because it interrupts who can live on your plants and when they can return.
Moving related crops each season denies specialized herbivores and fungi a steady host. Most attackers focus on a few plant families. When hosts disappear for several years, populations fall and infections lose momentum.
Rotation is a core cultural control in integrated pest management. IPM asks gardeners to monitor, identify, set action thresholds, choose least-toxic control, and then evaluate. Rotation fits prevention, which is the most effective and least costly step.
- Rotate families every 3–4 years; extend to 5–7 years for stubborn tomato soil issues.
- Tilling in fall can expose overwintering stages to weather and predators.
- Interplanting and shifting planting dates reduce peak pressure and slow spread.
Beyond fewer pests and diseases, rotation improves soil structure and fertility by alternating heavy feeders and nitrogen-fixers. Fewer broad-spectrum treatments mean more beneficial insects remain to pollinate and control unwanted insects naturally.
| Action | Benefit | How to apply |
|---|---|---|
| Rotate crop family | Reduces host availability | Move families each year; 3–4 year cycle |
| Interplant & time plantings | Interrupts spread | Stagger sowing and add companion plants |
| Record & evaluate | Improves future control | Log bed maps, notes on thresholds and outcomes |
i solved pest disease problems with this: a quick-start overview
Follow a simple four-zone plan to keep susceptible plants apart and cut recurring issues fast. This short guide shows a practical layout for home beds, raised boxes, and containers so you can start rotating next season.
A compact rotation keeps each family moving so trouble can’t settle in one bed. Group by family and shift them each year to interrupt life cycles.

The four-year rotation at a glance
- Zone A: Nightshades (tomato, pepper).
- Zone B: Cucurbits (cucumber, squash).
- Zone C: Brassicas (chard, kale) and ornamentals for interplanting.
- Zone D: Legumes, roots, and leafy greens.
How this plan fits small home gardens and raised beds
Label beds A–D and move groups clockwise each season. If you have two beds, split each into two zones and rotate inside and between beds.
Use containers as floating zones in tight yards. Move trellises or use portable supports so vining crops follow the rotation easily.
“Rotate nightshades away from last year’s bed — some tomato issues can linger five to seven years.”
Early planting can dodge migrating insect peaks. Interplant chard, kale, and basil with ornamentals to lower buildup. This design supports integrated pest management by making monitoring and targeted action by bed much simpler.
Know your crop families before you rotate
Map families in your garden first — that map guides every rotation move. Knowing which crops are related helps you avoid repeating hosts and keeps yields steadier.
Which families matter most?
Core groups to watch:
- Nightshades: tomato, pepper, eggplant, potato.
- Cucurbits: cucumber, squash, melon.
- Brassicas: broccoli, kale, cabbage, cauliflower.
- Legumes: beans, peas.
- Roots: carrot, beet, radish.
- Leafy greens: lettuce, spinach, chard.
Why family links matter
Many attackers specialize and return to related hosts. They can overwinter in soil or plant debris and strike the same plant group the next season. Rotation is most effective against narrow hosts; it is less useful against generalist insects, so pair rotation with monitoring.
Quick test: if two crops share a common pest often, treat them as kin in your plan and separate them next year. Label beds by family, add herbs and flowers to your map, and use trusted research-based information when unsure. Knowing what’s related is the foundation for fewer midseason surprises in the garden.
Map your garden: designing beds to support rotation
Make a simple bed map that keeps plants moving and makes scouting easy. A clear layout saves time and helps the gardener spot issues early.
A thoughtful bed map makes rotation a simple habit that protects soil and yields. Start by dividing the site into four equal zones so each family has a home now and a destination in future years.

Keep beds reachable. Use consistent bed dimensions and paths so you can reach plants without stepping on soil. Good access lowers compaction and helps you spot pests and weeds sooner.
- Use movable trellises so vining crops follow rotation without a redesign.
- Label zones A–D with weatherproof tags and update labels after planting.
- Leave a few inches between mulch and stems to deter rot and hidden pest entry.
- Plan a light fall till only if you need to expose overwintering insects to cold and predators.
Interplant ornamentals and herbs to break scent cues and reduce buildup. Keep a simple map that records years and zone moves so the plan stays accurate when the season gets busy.
Season-by-season rotation steps for United States gardeners
Short answer:Set clear tasks for each season to keep beds productive and reduce recurring threats. Simple, steady steps make pest management easier and help soil recover across years.
Spring: bed prep and placing young seedlings
Run a soil test and add only what’s recommended. Set beds by family and plant healthy, resistant varieties as young seedlings in their rotation zone.
Mulch after planting, keeping material off stems. Water evenly to reduce stress that can attract a pest.
Summer: scouting, interplanting, and timely harvest
Scout twice weekly, preferably in the cool of early morning. Check plants top to bottom for early signs of any problem.
Interplant quick herbs and flowers to invite beneficial insects. Harvest promptly and remove badly affected leaves to improve airflow.
Fall: cover crops, sanitation, and recordkeeping
Pull spent plants and dispose of diseased debris. Sow cover crops to protect soil and set next year up for success.
Mow nearby weeds before they set seed and log what grew, when an issue began, and which actions worked.
Winter: plan next year’s rotation and seed selections
Sketch the rotation map and shift each family one zone for the next few years. Choose resistant cultivars and order seeds timed to avoid peak insect flights.
“Prevention is the most effective tool—plan now to save time and keep plants healthier later.”
| Season | Key actions | Why it matters |
|---|---|---|
| Spring | Soil test, set beds, plant healthy seedlings, mulch | Targets nutrition and early establishment |
| Summer | Scout early morning, interplant, timely harvest | Detects issues early and supports beneficials |
| Fall/Winter | Sanitize, sow cover crops, map rotation, select seeds | Reduces carryover and primes next season |
For a simple layout that supports these steps, see a practical guide to planning crop movement in small beds: planning a vegetable garden layout.
Integrate IPM: the backbone of safer pest management
IPM focuses on prevention, early action, and careful review. Follow a simple cycle—monitor, identify, set thresholds, act, and evaluate—to keep plants healthy and reduce heavy treatments.
Begin by scouting your beds on a set schedule. Note where each crop sits in your rotation and which insects or symptoms appear most often. Patterns reveal where to focus efforts.

How do I monitor and identify accurately?
Use clear photos and a trusted guide before you act. Accurate ID prevents wasted effort and protects beneficial insects.
When should I intervene?
Set action thresholds that match your goals. Small cosmetic feeding can be acceptable when natural enemies keep numbers low.
What control steps work best first?
Start with prevention: rotate crops, choose the right plant for each bed, and build healthy soil. Interplanting and timing plantings often reduce peak pressure.
Apply mechanical controls next: hand removal, barriers, and targeted traps. Conserve habitat for natural enemies and limit sprays that harm them.
Use least-toxic chemicals only when other options fail. Evaluate results monthly and log outcomes to refine your garden design and scouting plan.
- Monitor routinely and map trends.
- Identify precisely using photos and guides.
- Act with cultural, mechanical, then biological or chemical control.
- Evaluate and record to improve next season.
For deeper guidance on integrated pest management steps and habitat strategies, and to explore companion planting ideas that support beneficial insects, see this practical herb setup: best hydroponic herb garden.
Cultural controls that supercharge rotation
Small changes in soil care and timing can multiply the benefits of a rotation plan. These cultural moves boost plant vigor, slow many pests, and make the overall integrated pest strategy easier to manage.
How should I prepare soil, mulch, and water?
Start with a soil test and amend only as recommended. Use organic mulch to conserve moisture and feed soil life. Avoid fresh manure as a top-dress.
Keep mulch pulled back a few inches from stems. That reduces rot and entry points near crowns. Water deeply and on a schedule to prevent stress that draws insect attack.
How can interplanting and timing help?
Interplant unrelated species to dilute cues that attract repeat attackers. Shift planting dates to miss migratory peaks; plant earlier or later and harvest sooner when needed.
What if bed space is tight?
Lay troubled areas fallow for a season, use containers, or refill raised beds with fresh soil to keep families separate. Weed lightly and often to cut bridges between crops and improve airflow.
- Track which cultural tweaks lower a recurring problem so you repeat what works next year.
- Encourage beneficial insects with continuous bloom and habitat; diversity helps natural control.
Weed management that supports disease and pest control
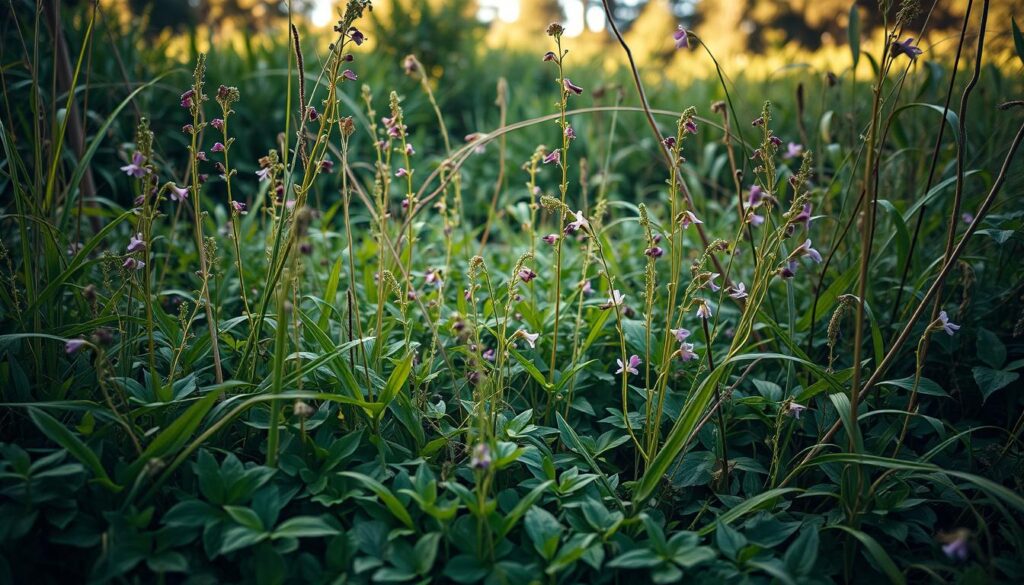
Keep weeds under steady control so beds breathe and plants stay healthier all season.
Weeds offer hiding spots and humidity that help pests and foliar issues spread. Tidy beds cut those safe havens and make scouting easier.
How can targeted spot sprays and smothering help?
Use a focused stream of 5% vinegar mixed with a few drops of liquid soap on leaves in the heat of the day. Apply only to cracks and hardscapes and shield nearby desirable plants.
For larger patches, smother the area with cardboard and cover it with at least 3 inches of shredded bark. Leave the cover through a season to reset the bed and cut the seed bank.
When should I use corn gluten meal and other timing tips?
Apply corn gluten meal as a pre-emergent before weed seeds germinate. Work it into the top 2–3 inches and water it in to activate the inhibitor of root formation.
Remember that corn gluten meal is high in nitrogen. Skip additional fertilizing for about a month after application to avoid overfeeding.
- Targeted spray: 5% vinegar + a few drops of liquid soap on hardscapes in hot sun; protect nearby plants.
- Smothering: cardboard + 3″ shredded bark for wide patches; leave one season.
- Pre-emergent timing: work corn gluten meal into top 2–3 inches and water.
- Edges and mowing: keep garden edges trimmed so pests have fewer weedy bridges into beds.
- Sanitation: use soapy water to clean tools and containers after weeding to avoid moving seeds and pathogens.
Combine smothering, timely pre-emergent use, and regular hand-weeding to lower overall pressure. Fewer weeds mean better airflow and quicker drying of leaves, which reduces foliar threats to nearby plants.
Record dates of your applications and the flushes you stopped so you can repeat effective timing next year.
Targeted tactics for common insect pests
Short, practical steps help you protect plants while keeping beneficials safe. Use barriers, early collection, and gentle sprays before considering stronger measures.
Slugs and snails: Ring vulnerable beds with copper strips or scatter pine needles, coffee grounds, crushed eggshells, or natural diatomaceous earth. Set grapefruit rinds, upside-down pots, or damp boards as night traps and collect occupants into a bowl of warm soapy water at dawn.
Japanese beetles: Handpick early in the morning when they are sluggish. Drop them into warm soapy water or use a small hand vacuum on foliage. Plant garlic and chives as deterrents and try a larkspur leaf spray if feeding is heavy.
Aphids and spider mites: A strong water blast dislodges most. Follow with spot wipes of soapy water or tape blotting. If mites persist, apply a buttermilk‑flour spray to cover leaf undersides and repeat as needed.
Cucumber beetles and leafhoppers: Use weekly herbal brews or a red‑pepper spray (let sit overnight) around cucumber and brassica rows. Keep foliage dry, remove badly infested leaves, and pull nearby weeds to cut hiding places.
“Recheck beds after two days; small actions now reduce bigger control steps later.”
- Refresh barriers after rain.
- Collect traps each morning of the day you check.
- Escalate only inside your broader pest management plan while protecting helpful insects.
Disease prevention and response the IPM way
Keep small issues small: use prevention first, then gentle responses tied to an integrated pest management plan.
A few careful routines can keep common foliar issues from spreading across your beds.

How can chamomile and baking soda help?
For young seedlings, bottom-water using chamomile tea made from 16 tea bags (or 2 cups dried flowers) simmered in 2 quarts and steeped several hours. It helps prevent damping-off and supports healthy roots.
For roses or early fungal spots, use a baking soda tonic: 2 tsp baking soda + 1/2 tsp liquid soap in 2 quarts water as a fine foliar mist.
Are garlic and aspirin useful on leaves?
Make garlic “soup”: puree 2 cloves in 1 quart water, strain, add 1/8 tsp liquid soap and dilute 1:10 for spray. For a simple boost, dissolve two uncoated 325 mg aspirin tablets in 1 quart water and mist lightly.
Apply sprays in the early morning when temps stay below 85°F to reduce burn and give leaves time to dry.
Which cultural steps reduce spread?
- Water at soil level, prune crowded growth, and space plants so leaves dry fast.
- Remove infected leaves, clean tools, and discard debris to stop spores moving beds.
- Keep weeds down to improve airflow and protect beneficial insects.
“Choose least-toxic options first and track what works—repeat common solutions that suit your site.”
| Action | When | Why it helps |
|---|---|---|
| Chamomile tea | At seedling stage | Prevents damping-off; gentle root support |
| Baking soda tonic | Early fungal signs | Alters leaf surface pH; slows spores |
| Garlic/aspirin sprays | Cool, calm hours | Foliar resistance boost; safe if timed |
Animal pests: deer, rabbits, and moles without harsh chemicals
Practical barriers and mild repellents protect beds more than reactive sprays. Use simple fences, scent cues, and targeted mixes so your garden stays productive and wildlife moves on.
Wildlife can nibble, tunnel, and trample beds fast, so practical barriers matter. For durable deer control, install a tall fence tilted outward at 45° or two fences about five feet apart. Add Mylar strips or hung CDs to create startling motion near favorite plants.
How can scents and homemade sprays help deer?
Hang scented soap bars (Lifebuoy wrapped) on shrubs and refresh often. Make an egg-and-bouillon repellent: steep 12 eggs and four beef bouillon cubes in water until odorous, strain, then add 2 tbsp liquid soap per gallon and spray around — avoid direct contact on edible plants.
What stops rabbits from chewing seedlings?
Dust seedlings lightly with baby powder or flour and use garlic powder on mature stems. Plant garlic and wormwood as scent barriers. Press holly branches or sweet gum pods into soil to form a prickly ring around vulnerable stems.
Which tactics disrupt moles humanely?
Set glass bottle necks at ground level or install toy windmills to add noise and vibration. Drop crushed garlic into active runs or pour a castor oil mix (8 tbsp castor oil + 1 tbsp liquid soap per gallon) into tunnels to deter tunneling.
- Rotate tactics over the day and season so animals do not adapt.
- Protect edibles with food-safe methods and physical barriers when possible.
Safe, smart use of sprays and homemade solutions
Homemade blends are handy, but safety steps make them garden-friendly and effective. Follow a few clear rules to protect helpers and get reliable results.
When should you escalate and how to use sprays safely?
Use sprays only after cultural and mechanical steps fail to keep pressure below your threshold.
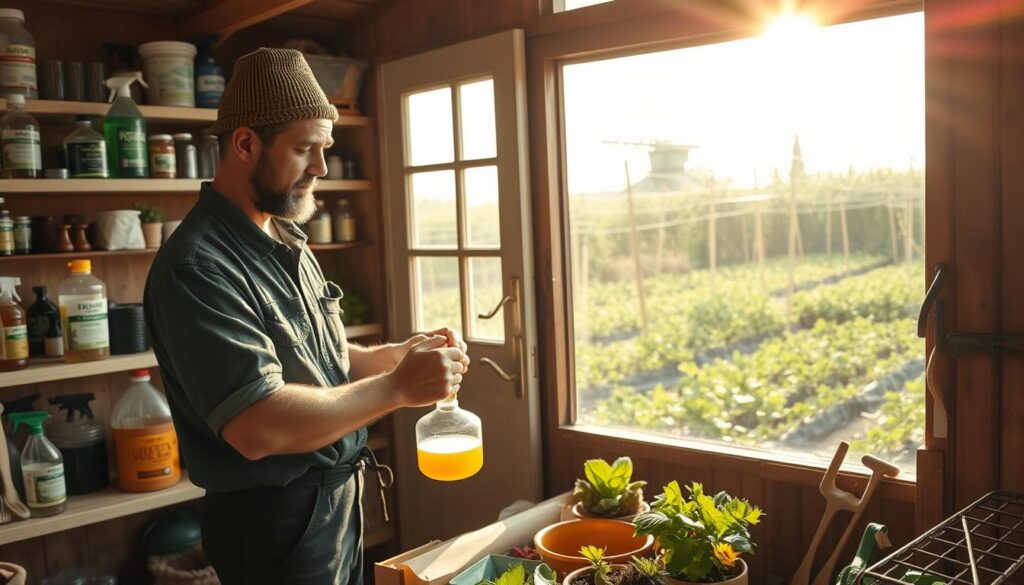
Test any new spray on a small patch of foliage and wait two days for signs of burn or discoloration. Add a few drops of liquid soap as an emulsifier, but never use laundry detergents that strip leaf cuticles.
Practical safety steps gardeners should follow
- Apply early morning when temps are below 85°F and winds are calm.
- Wear gloves and eye/nose protection, especially around alcohols or aromatic oils.
- Examine plants first to confirm targets and avoid spraying beneficials that help control pests.
- Clean equipment with soapy water after use and store bottles labeled with contents and date.
| Action | Why | How |
|---|---|---|
| Patch test | Prevents leaf burn | Spray 1–2 leaves; wait 48 hours |
| Emulsifier | Helps blend oils | Use a few drops of true soap (pure castile or Dr. Bronner’s) |
| Escalation plan | Limits unnecessary sprays | Move from cultural to mechanical, then targeted sprays |
Keep clear notes of what you applied and where. Good records and reliable information make future choices safer and more effective for your garden.
Diagnose problems like an Extension Master Gardener
Learn to find causes before you act. A careful walk through each bed reveals the clues an experienced volunteer would spot first. Clear ID avoids needless treatments and protects helpers in the garden.
How should I examine plants without harming helpful insects?
Scout methodically: examine plants from top to bottom, including undersides of leaves, stems, and nearby soil. Look for eggs, larvae, and beneficial predators before removing anything.
Photograph signs in good light. Photos help compare later and let you show local extension master volunteers when you ask for a second opinion.
Where can I confirm an ID?
Use research-backed pages from your state university extension and the OSU IPM Center’s Solve Pest Problems for photo-rich, peer-reviewed information. These sources list look-alikes, thresholds, and least-toxic controls.
- Note thresholds: not every insect needs action; act only when damage is unacceptable.
- Keep a diagnosis log: what you saw, where, and your conclusion.
- Share findings with an extension master gardener clinic for tricky cases.
“Good diagnosis links ID to rotation and integrated pest management so future seasons run smoother.”
Recordkeeping that improves results year after year
Prevention, early intervention, and clear records are the three most important tools a gardener has. Good notes turn seasonal guesses into steady gains. Keep records simple so you will use them.

What should a good log include?
Start a one-page record for each bed and update it during the season. Track dates, varieties, sources, and where each plant family grew so rotation stays accurate across years.
- Create a simple log: sections for dates, varieties, purchase source, and the zone (A–D) where plants grew.
- Note pest problems: record thresholds, actions taken, and whether the action worked; use these notes to refine pest management next season.
- Track disease onset and weather at that time; log airflow, irrigation, and sanitation changes and outcomes.
- Add weed timing: note flushes so pre-emergent or smothering can be scheduled more effectively.
- Include seed lot and resistant-cultivar tags so variety-specific issues are easier to spot.
- Record inputs: mulch depth, soil test results, and amendments to link vigor and outcomes.
- Keep photos: monthly folders labeled by bed make visual comparison fast and objective.
- End the season with a summary: five wins, five problems, and first steps for next year.
Tip: update your garden map each season so related crops stay apart for at least 3–4 years; extend longer for some stubborn issues. Use your notes to adjust thresholds and make faster, smarter choices in coming years.
Trusted, research-based help you can access at home
Find clear, photo-driven guidance that helps confirm IDs and guides safer action on your beds. Reliable references cut uncertainty and point to prevention-first steps you can apply today.
What Solve Pest Problems offers
Solve Pest Problems is a peer-reviewed, photo-rich site from the Oregon IPM Center. Launched in 2022, it prioritizes high‑importance issues, pesticide safety, and risk reduction.
The site grows toward 100 pages and includes English and Spanish options. Click photos to reach identification, look‑alikes, prevention, and stepwise controls that align with integrated pest management and university research.
How to apply online guidance to your site
- Use photos to confirm IDs before you act and save favorite pages for quick access.
- Follow IPM steps: choose cultural controls first, then mechanical, biological, and careful chemical choices.
- Pair checklists on the site with your rotation notes and map so actions match each bed.
- Share links with neighbors and consult a state university resource if local advice is needed.
“Rely on research-based information to decide whether a spray is needed; many issues fade with simple cultural steps.”
Conclusion
Rotate plant families every 3–4 years, lead with prevention, and keep simple records to shrink recurring threats. These habits make gardens steadier and let gardeners act early and lightly.
Keep this playbook handy for common pest flare-ups like slugs snails, Japanese beetles, spider mites, and cucumber beetles. Use least‑toxic tools first and protect helpful insects so plants recover faster.
Log what worked, repeat the rotation next season, and apply integrated pest principles across beds. When unsure, think like an extension master gardener: examine carefully, confirm an ID, and choose the gentlest effective tactic.
Lean on research‑based guides and local extension support. Even small backyards can become resilient gardens that reward steady care and patient practice.
FAQ
What is crop rotation and how does it reduce pest and disease pressure?
Crop rotation is moving plant families through different beds each year so pests and pathogens lose their preferred host. By breaking life cycles, rotation lowers populations of cucumber beetles, root pathogens, and many soilborne fungi. It also helps maintain soil fertility and supports beneficial insects that suppress outbreaks.
How do I plan a four-year rotation for a small home garden or raised bed?
Divide your space into at least four blocks and assign different families each year: nightshades (tomatoes, peppers), cucurbits (cucumbers, squash), legumes (beans, peas), and brassicas/roots/greens. Move families clockwise annually. Keep notes on varieties and pest issues so you can adjust the next season.
Which crop families should I avoid planting back-to-back?
Avoid repeating the same family in the same spot within two to three years. Focus on tomatoes/peppers, cucumbers/squash, beans/peas, brassicas, roots, and greens as distinct groups. Many insects and diseases target related plants, so spacing them apart reduces carryover.
How does rotation benefit soil and beneficial insects?
Rotating crops diversifies root structures and nutrient demands, which improves soil structure and microbial balance. Flowering cover crops and interplants provide nectar and habitat for predators and pollinators, boosting natural biological control and long-term garden health.
What should I do each season to support my rotation plan?
Spring: test soil, amend, and place young seedlings where they fit the rotation. Summer: scout weekly, interplant beneficials, and harvest promptly. Fall: plant cover crops, remove diseased debris, and record outcomes. Winter: plan seed choices and bed assignments for next year.
How do I monitor and identify pests before they cause major damage?
Inspect plants top to bottom early in the morning. Look under leaves, at stems, and in the soil surface for eggs, larvae, and signs like stippling or wilting. Use state university guides and the OSU IPM Center photos for ID. Accurate ID helps you choose least-toxic controls first.
When space is tight, how can I still rotate effectively?
Use containers and raised beds to expand rotation options. Leave one bed fallow, grow a non-host cover crop, or practice relay planting to interrupt pest cycles. Even short rotations and alternating crops in containers reduce pressure compared with continuous monoculture.
What cultural practices support rotation and cut pest rates?
Good soil prep, proper mulch spacing, drip irrigation, and plant spacing all reduce disease risk. Rotate planting times and interplant herbs or flowers to mask crop scent and attract predators. Sanitation—removing infected plants and debris—limits overwintering pest sources.
Which nonchemical tactics work for slugs, snails, and ground pests?
Use barriers (copper), hand-collection in the early morning, iron phosphate baits, and habitat reduction like removing heavy mulch near seedlings. For moles, try vibration devices and castor oil mixes; for rabbits and deer, use fencing, scents, and prickly rings.
Are homemade sprays like soapy water or garlic safe and effective?
Simple sprays—soapy water, buttermilk-flour, chamomile tea, or garlic “soup”—can suppress aphids, fungal spores, and some foliage pests when used properly. Apply in early morning, test on a few leaves first, and avoid detergents. Always wear gloves and follow pesticide safety basics if using stronger products.
How do I handle common flying and chewing insects such as aphids, spider mites, and Japanese beetles?
Start with physical removal and water blasts for aphids and spider mites, use soapy water or insecticidal soaps when needed, and hand-pick Japanese beetles into soapy buckets. Plant deterrents and maintain strong plant vigor through rotation and soil health to reduce outbreaks.
What sanitation steps prevent disease spread between seasons?
Clean up plant debris, remove infected roots and fruit, and sanitize tools. Rotate out beds that hosted severe fungal or bacterial outbreaks and grow a non-host cover crop. Improve airflow and switch to drip irrigation to keep foliage dry.
How do I use garden records to improve rotation over time?
Track planting dates, varieties, pest and disease thresholds, controls used, and outcomes. Note which beds had issues like cucumber beetles or fungal spots. Over seasons these notes reveal patterns so you can refine rotations, varieties, and timings.
Where can I find research-based help for identification and treatment?
Use state university extension sites, the OSU IPM Center, and the Oregon IPM “Solve Pest Problems” resources for photos, IDs, and tested controls. Extension Master Gardener programs also offer localized advice and diagnostic services.
When should I consider a chemical control and how do I stay safe?
Use chemicals only when monitoring shows thresholds are exceeded and cultural or biological tactics have failed. Read labels, choose targeted and low-toxicity options, apply in early morning, and wear protective gear. Prefer products approved by university extension guidance for home gardens.
Can crop rotation help control weeds as well?
Yes. Rotating crops with different planting times and cover crops suppresses weed germination and interrupts life cycles. Use corn gluten meal in early spring to prevent weed seeds from sprouting on paths and beds, and spot-treat hardscape weeds with vinegar and liquid soap.