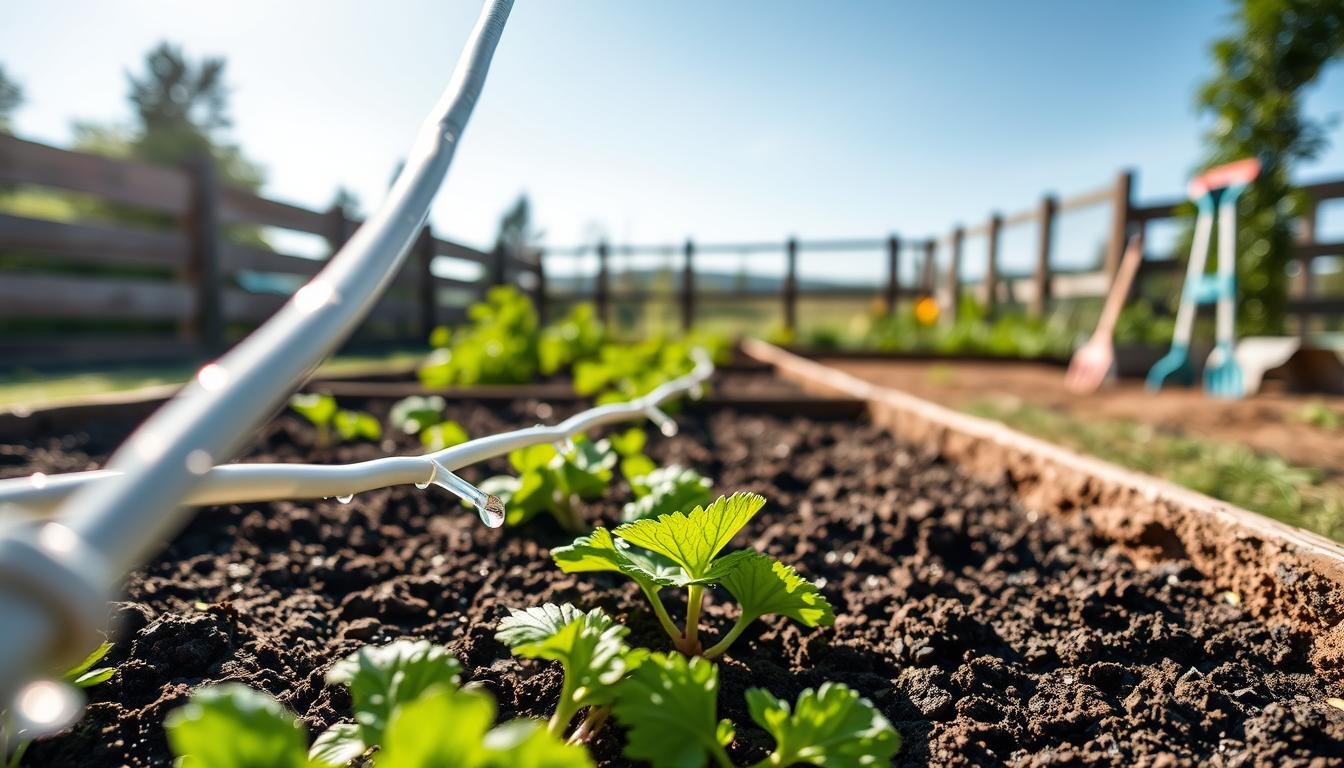
Raised bed drippers often clog after winter because water, sediment, minerals, and small bits of organic debris can sit inside the tubing while the system is off. When spring watering starts again, that buildup may move straight into the emitter openings.
Before replacing the whole drip line, check the simple things first: flush the tubing, clean the filter, test the pressure, and see whether the problem affects one dripper or the entire bed. That order can save time, parts, and a lot of guesswork.
Quick answer
If raised bed drippers clog after winter storage, the most common causes are trapped sediment, mineral buildup, algae or slime, dirty filter screens, blocked tubing ends, or damaged emitters. Start by opening the end of the line and flushing it until the water runs clear.
If several emitters are weak at the same time, look at the filter, water source, and pressure. If only one or two drippers stay blocked after flushing, individual replacement emitters may make more sense than replacing the entire system.
Good drip-irrigation troubleshooting starts with the easiest checks first: water flow, filter condition, line flushing, and only then replacement parts.
Key takeaways
- Flush before replacing. A clogged line end or dirty filter can make several emitters look bad at once.
- Check the pattern. One blocked dripper usually points to an emitter issue, while many weak drippers may point to filtration, pressure, or tubing blockage.
- Be careful with tiny openings. Forcing wire, nails, or sharp tools into emitters can damage them.
- Use parts only where they fit the problem. Filters, replacement emitters, and flush caps each solve different maintenance issues.
- Prevent next winter’s clogging. Clean the filter, flush the line, drain what you can, and protect open tubing ends before storage.
Helpful products at a glance
These support parts fit different parts of the troubleshooting process. They are not required for every raised bed drip system, but they may be useful when the issue matches the part.
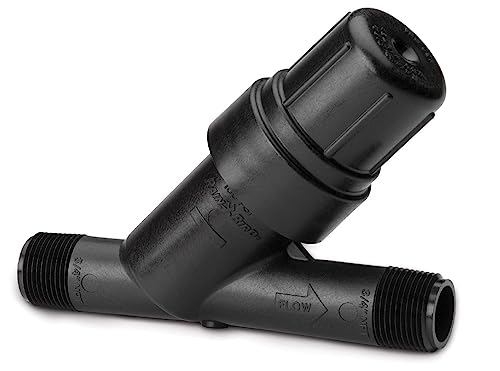
Best for debris-related clogs because it filters water before emitters
- Prevents clogging of downstream Drip irrigation components
- Pre-installed 200 mesh (75 micron) stainless-steel filter catches debris
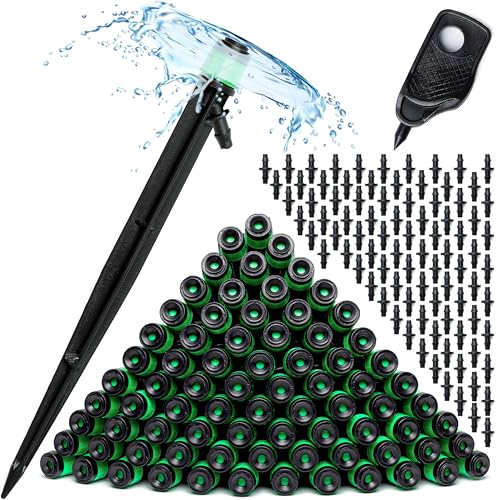
Best for failed individual drippers because it supports spot replacement
- Be a Gardening Master with the help of our superior and complete Drip Irrigation Emitters Kit: 100 x drip emitters fan shape + 100 x 1/4" Barbed Coupling for easy connection + Bonus 1/4" Mini Hole Punch to drill the 1/2 inch mainline 1 x Complete Instructions Guide Hard Copy + 1 Grow your Own Vegetables Guide full with pieces of advice and practical tips Digital Format + Grow your Own Fruits Guide Digital Format
- Cut down your water bill - Minimize the amount of water loss by watering the roots of the plants with irrigation sprinkler heads. Adjust the water spray by rotating the cap and give your thirsty plants the amount of water they need. Our bubbler sprinkler heads can be used as irrigation drippers for potted plants, drip irrigation sprinklers for healthy vegetables, flower bed sprinkler for long-lasting roses, drip line sprinkler heads for fruit trees, or as irrigation drip system for the lawn
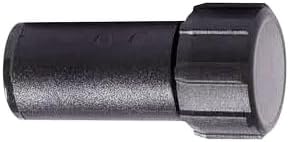
Best for seasonal flushing because it keeps compatible line ends accessible
- FROM AN AMERICAN COMPANY
- Operating pressure: 10 to 30 PSI - Optimal pressure 25PSI
Why raised bed drippers clog after winter storage
Winter storage can leave a drip system sitting with old water, fine soil particles, minerals, and plant debris inside the tubing. When that water dries or sits still, it can leave buildup around small emitter openings.
Raised beds can make the problem more noticeable because many systems use small tubing, low-flow emitters, and short runs. A small blockage may be enough to turn a steady drip into a weak trickle.
Common causes after winter
| Possible cause | What it may look like | First useful check |
|---|---|---|
| Sediment in the line | Several drippers start weak or stop flowing | Open the line end and flush the tubing |
| Dirty filter screen | Flow is weak across most of the bed | Remove and rinse the filter element |
| Mineral buildup | Emitter openings look crusty or partly blocked | Inspect emitters and clean only as recommended |
| Algae or organic slime | Water looks dirty when the line is first flushed | Flush until water runs clear |
| Damaged emitter or tubing | One spot leaks, sprays, or stays blocked | Inspect that emitter and nearby tubing |
A filter is often part of this check because it sits before the small drip components. If the filter is dirty, debris may keep moving downstream every time the system starts.
For a raised bed setup, the goal is not to make the system complicated. It is to stop grit and debris before they reach small emitter openings. A filter may help with that, but it still needs regular cleaning.
Start with the simplest checks
Do not begin by pulling every emitter out. Work from the water source toward the end of the line so you can isolate where the problem starts.
Use this troubleshooting order
- Turn off the water and disconnect the line end or end cap.
- Remove and rinse the filter screen if your setup has one.
- Open the line end and run water through the tubing.
- Flush until the water looks clear.
- Reconnect the line end and run the system again.
- Compare the flow from the first, middle, and last drippers.
- Mark any individual emitters that still stay blocked.
If the line end is hard to open, seasonal maintenance becomes more annoying than it needs to be. A compatible flush cap can make that job easier on drip tubing that matches the listed size.
Flush caps do not clean a system by themselves. They simply make it easier to open the end of the tubing so trapped debris has a way out.
If water is weak from the first emitter onward, the issue may be closer to the filter, valve, water source, or pressure setup. If the first few emitters work but the last ones do not, the line may still have debris or pressure loss farther down.
How to tell whether it is a clog, pressure issue, or damaged part
A clogged dripper is only one possible reason for weak flow. Raised bed systems can also act strange after winter if tubing cracks, fittings loosen, filters clog, or pressure changes.
| What you see | Likely direction | What to do next |
|---|---|---|
| Every dripper is weak | Filter, water supply, or pressure issue | Clean the filter and check the water flow before replacing emitters |
| Only one or two drippers fail | Individual emitter blockage or damage | Clean or replace only those emitters |
| The line leaks near a fitting | Loose or cracked connection | Inspect the fitting and tubing before running the system longer |
| Water sprays instead of drips | Damaged emitter or wrong pressure | Check the emitter and pressure setup |
| Flow improves after flushing | Sediment or loose debris | Flush again and clean the filter before regular use |
This is also where tubing layout matters. Short raised bed runs are usually easier to diagnose than long garden runs because you can compare each dripper quickly.
When cleaning is enough
Cleaning may be enough when the clog is from loose sediment, a dirty filter, or debris trapped near the line end. If flow improves after flushing, keep the system running for a few minutes and watch whether the problem returns.
Do not force a sharp object into a tiny emitter opening. It may enlarge or damage the opening, which can change the flow even if the dripper starts working again.
Some replaceable emitters have caps that can be removed for cleaning, but that does not mean every old emitter is worth saving. If an emitter stays blocked after basic cleaning, replacement may be the cleaner fix.
Check the filter again after flushing. A line that sat all winter may release grit slowly, and the filter may catch more debris during the first spring startup than it does later in the season.
When replacement parts may be worth it
Replacement parts make sense when you have already flushed the line, cleaned the filter, checked for obvious pressure problems, and isolated the issue to a part that still fails.
If several drippers clog at once after winter, an inline filter such as the Rain Bird RBY075S filter can be a practical support part to check before assuming every emitter needs replacement. Check the thread size and fitting compatibility before buying any filter for an existing setup.
- Prevents clogging of downstream Drip irrigation components
- Pre-installed 200 mesh (75 micron) stainless-steel filter catches debris
- 3/4" male pipe thread inlet and outlet for connection to valves and pressure regulators
- Cap quickly unthreads providing easy access to filter element for cleaning
This kind of filter is most useful when debris is part of the problem. It will not fix emitters that are already permanently blocked, cracked, or mismatched to the system. You can check the current filter details on Amazon if your setup uses compatible fittings.
Replacing individual emitters
If only a few emitters stay blocked after flushing and filter cleaning, replacement emitters may be more practical than replacing the entire raised bed drip line. This is especially true when the tubing is still in good shape and most of the system waters evenly.
- Be a Gardening Master with the help of our superior and complete Drip Irrigation Emitters Kit: 100 x drip emitters fan shape + 100 x 1/4" Barbed Coupling for easy connection + Bonus 1/4" Mini Hole Punch to drill the 1/2 inch mainline 1 x Complete Instructions Guide Hard Copy + 1 Grow your Own Vegetables Guide full with pieces of advice and practical tips Digital Format + Grow your Own Fruits Guide Digital Format
- Cut down your water bill - Minimize the amount of water loss by watering the roots of the plants with irrigation sprinkler heads. Adjust the water spray by rotating the cap and give your thirsty plants the amount of water they need. Our bubbler sprinkler heads can be used as irrigation drippers for potted plants, drip irrigation sprinklers for healthy vegetables, flower bed sprinkler for long-lasting roses, drip line sprinkler heads for fruit trees, or as irrigation drip system for the lawn
- Make your own irrigation system easier than ever - (1) Using a barb connector, connect the drip irrigation spray emitters to the 1/4 inch drip irrigation tubing (2) connect this line to 1/2 inch drip irrigation tubing (3) stick the drip irrigation stake into the soil, adjust the desired irrigation fan spray width and feed your plant with your own drip system emitters. The 1/4 drip emitters work with a pressure between 20 to 45 PSI and offer a flow range from a slow drip to full flow
- Enjoy taking care of your garden with high quality drip irrigation parts and forget about broken irrigation emitters and clogged drip irrigation heads. With a length of 7.48 inch and a sharp bottom, the irrigation stakes can be easily fixed into the ground and stays still even in loose soil. Perfect for long time application, the bubbler sprinkler heads are detachable and easy to clean so you don’t worry about clogging. Make gardening less of a chore
The CARPATHEN emitter pack may fit readers who need spot replacements rather than a full rebuild. Check tubing fit, emitter spacing, and your plants’ water needs before treating any replacement emitter as a direct swap. You can see this replacement emitter option on Amazon for current listing details.
How to prevent the same clog next winter
The best time to prevent spring clogs is at the end of the growing season. A few minutes of cleanup before storage can reduce the amount of debris left sitting in the tubing.
End-of-season checklist
- Flush each raised bed drip line before storing or shutting down the system.
- Clean the filter screen and let it dry before storage if it is removable.
- Drain water from tubing where practical.
- Close or protect open tubing ends so insects and debris do not enter.
- Store removable head assembly parts indoors if your setup allows it.
- Inspect cracked tubing, loose fittings, and damaged emitters before spring planting.
A compatible end flush cap can make seasonal flushing easier because the line end is easier to open and close. The key word is compatible; tubing outside diameter matters with compression-style parts.
- FROM AN AMERICAN COMPANY
- Operating pressure: 10 to 30 PSI - Optimal pressure 25PSI
- Secure and easy installation without glues or clamps
- UV Resistant High Impact Plastic
The DIG compression end flush cap is listed for .700 OD to .704 OD drip tubing, so it should not be treated as a universal fit. If your tubing matches that size, you can view the DIG compression end flush cap on Amazon and compare it with your current line-end setup.
What not to do
Some quick fixes can create bigger problems. If the system has been sitting through winter, slow down and diagnose before cutting tubing or replacing parts.
- Do not replace every emitter first. A dirty filter or blocked line can make good emitters look bad.
- Do not poke aggressively into emitter openings. That can damage small flow passages.
- Do not ignore pressure. Too much or too little pressure can affect drip performance.
- Do not assume one cause fits every bed. Water quality, storage habits, tubing layout, and filter maintenance all matter.
- Do not leave small parts loose around kids or pets. Emitters, caps, and fittings are easy to drop during repairs.
FAQ
Can clogged raised bed drippers be cleaned?
Sometimes, yes. Light sediment or debris clogs may improve after flushing the tubing and cleaning the filter, but damaged or badly blocked emitters may still need replacement.
Should I replace all drippers after winter storage?
No, not as the first step. Flush the line, clean the filter, and check the flow pattern first. Replace only the emitters that still fail after basic troubleshooting.
Why are all my drippers weak at the same time?
When all drippers are weak, the issue may be a dirty filter, blocked supply line, low water flow, or pressure problem. Individual emitter replacement usually makes more sense when only a few drippers fail.
How often should I flush raised bed drip lines?
Flush them at spring startup and again before winter shutdown. If your water has a lot of sediment or the beds sit unused for long periods, flushing more often may help.
Do flush caps prevent clogs?
No. Flush caps do not prevent clogs by themselves. They make it easier to open the line end so you can flush trapped debris out of compatible tubing.
Final verdict
Raised bed drippers that clog after winter do not always need a full replacement. Start with the simple checks: clean the filter, open the line end, flush the tubing, and compare flow across the bed.
If the whole system stays weak, look closer at filtration, supply, and pressure. If only a few emitters remain blocked, spot replacement is usually the more practical path. For next winter, clean and flush the system before storage so old debris is not waiting in the line when spring starts.